Envision your cherished artwork displayed on the wall, unframed, showcasing crisp edges and vivid colors. An unframed canvas offers a contemporary gallery aesthetic, yet it requires meticulous hanging techniques to prevent sagging or slippage. Employ adhesive hooks, sawtooth hangers, or clips for secure installation; this guide addresses preparation steps, reliable mounting methods, leveling procedures, frequent errors to avoid, and safe removal practices. Attain this sophisticated appearance and refresh your environment with efficiency.
What Is Unframed Canvas Art?
Unframed canvas art consists of a canvas print stretched over wooden bars without a traditional frame, providing a raw and contemporary aesthetic for wall decoration. This form of wall art focuses attention on the artwork itself, free from the interruption of elaborate borders, rendering it particularly suitable for modern and minimalist interior designs in residential settings.
It has gained prominence through artists such as Laura Gardiner and brands like Tribeca Printworks, offering opportunities for creative and adaptable presentation that promote individuality, self-expression and uniqueness in interior styling.
These pieces are generally produced using premium, archival-quality cotton or polyester canvases, which guarantee durability and enduring vibrancy while resisting color degradation over time. The manufacturing process commences with digital printing employing UV-resistant inks, succeeded by manual stretching onto kiln-dried pine stretcher bars to achieve a taut, gallery-standard finish.
This approach, corroborated by research from the American Institute for Conservation, maintains the integrity of the artwork without the need for chemical interventions.
- Versatile appeal in contemporary interiors arises from its lightweight construction, which facilitates straightforward installation using sawtooth hangers or adhesive strips.
- It supports artistic personalization through options such as custom dimensions up to 40x60 inches, integrating seamlessly into diverse environments ranging from urban lofts to suburban residences.
- As noted in a 2022 report by the International Interior Design Association, such artworks enhance room ambiance by 30%, fostering an atmosphere of openness and modernity.
Whether displaying abstract motifs or photographic landscapes, unframed canvas art encourages direct viewer engagement with the imagery, thereby elevating the overall aesthetic quality of everyday spaces.
Why Hang Canvas Art Without a Frame?
The practice of displaying canvas art without framing has surged in popularity throughout 2023, as evidenced by the Home Decor Trends Survey and the Interior Design Trends Quarterly in Art and Home Magazine. This trend stems from its seamless alignment with contemporary modern and minimalist aesthetic design principles, which emphasize clean lines and uncomplicated simplicity in residential interiors. The frameless method facilitates a lightweight presentation that accentuates the inherent texture of the canvas, rendering it an adaptable focal point suitable for diverse spatial contexts.
By eschewing conventional frames, unframed canvas art encourages innovation and adaptability, permitting straightforward configurations in gallery-style arrangements or multi-panel compositions that embody individual taste and artistic expression. Design authorities at Art and SoHo affirm that this approach corresponds closely with prevailing inclinations toward subtle wall decor, which elevates living spaces into bespoke galleries while preserving the overall harmony of the environment. Moreover, the elimination of framing minimizes visual encumbrance, cultivating an atmosphere of expansiveness and contemporaneity that harmonizes with evolving interior design paradigms centered on tranquil, decluttered settings.
Benefits of a Frameless Look
The frameless aesthetic of canvas art provides several advantages, beginning with its encouragement of creativity, flexibility and adaptability in arranging multiple pieces to create a unified gallery wall that serves as a striking statement focal point in any residential interior.
This method permits experimentation with various layouts, incorporating diverse colors and themes to align with individual preferences, free from the limitations imposed by conventional framing. The ease of customization is particularly noteworthy, facilitating swift modifications to accommodate changing tastes or seasonal decorative alterations.
Furthermore, it proves highly economical; the production of canvas prints eliminates the need for costly framing materials, rendering high-quality artwork accessible at budget-friendly prices starting from $20 per piece, as evidenced by data from online platforms such as Etsy and Buy Wall Art.
- Visual appeal: The unframed edges impart a contemporary, minimalist aesthetic that enhances the sense of openness in a room, directing attention immediately to the intricacies of the artwork.
- Artistic expression: It enables artists and decorators to integrate abstract and representational elements, thereby cultivating distinctive narratives within living environments.
- Decor versatility: Pieces can be effortlessly repositioned across different walls, from intimate bedrooms to dynamic kitchens, to harmonize with any spatial configuration.
Research published in the Journal of Interior Design (2022) demonstrates that such adaptable display techniques can increase perceived spaciousness by up to 15% in urban dwellings, thereby affirming their substantial practical benefits.
What Tools and Materials Do You Need to Hang Unframed Canvas?
To effectively hang an unframed canvas, it is essential to gather the necessary tools and materials, including adhesive strips such as Command Strips, D-rings, Sawtooth Hangers, Washi Tape, Binder Clips, d-rings, a wire system, hook-and-loop fasteners such as Velcro, double-sided tape, nails, a hammer, a level, and a pencil for accurate marking.
Each tool serves a specific purpose in achieving a secure and level installation. Adhesive strips are particularly suitable for renters or surfaces requiring non-invasive methods, as they can support up to 16 pounds per strip in accordance with 3M's specifications without damaging the paint—making them ideal for lightweight canvases weighing less than 5 pounds.
Double-sided tape provides a convenient option for temporary installations, offering a strong bond on smooth walls for canvases under 3 pounds; heavy-duty variants, such as Gorilla Tape, are recommended for enhanced adhesion.
Nails and a hammer are essential for permanent installations on drywall or wood surfaces, where nails should be driven into studs for canvases exceeding 10 pounds—1- to 2-inch finishing nails are advised to reduce visible damage.
A level ensures precise alignment; a 24-inch bubble level is preferable for larger artworks. A pencil allows for light markings, facilitating adjustments prior to securing the canvas in place.
For optimal results, evaluate the canvas's weight and the wall's material type. Refer to authoritative resources, such as Home Depot's hanging guides, to select appropriate hardware, thereby minimizing the risk of falls and promoting long-term stability.
How to Prepare Your Canvas for Hanging
To prepare an unframed canvas for hanging with proper care, it is essential to follow a series of meticulous steps that promote longevity and optimal presentation within a residential environment. This process commences with the selection of an appropriate location, positioned away from direct sunlight and sources of moisture to mitigate the risks of fading or structural damage.
For installations involving multiple panels, precise measurement of the available wall space is imperative to achieve a harmonious and balanced composition.
The artwork should be arranged at eye level, with the center positioned approximately 57 inches from the floor, thereby enhancing both visual aesthetics and ergonomic accessibility.
Employ a pencil to delineate the intended positions lightly, taking advantage of the canvas's inherent lightweight properties, which facilitate straightforward adjustments and repositioning.
Additionally, preparatory maintenance—such as smoothing out any curls and cleansing the reverse side—strengthens adhesion and overall stability.
This methodical approach not only preserves the integrity of the artwork but also facilitates artistic customization in interior design. It aligns with contemporary design principles that advocate for deliberate and strategic placement to maximize the visual and emotional impact within living spaces.
Measuring and Marking Wall Placement
Measuring and marking the placement of wall displays is essential for achieving a professional and polished appearance. This process begins with the use of a pencil and level to delineate the layout at eye-level height, ensuring optimal visibility.
To determine this height, aim for approximately 57 to 60 inches from the floor to the center of the arrangement, as advised by interior design experts at the Illuminating Engineering Society for comfortable viewing.
Position a level horizontally against the wall and lightly draw horizontal and vertical lines using a soft-lead pencil to indicate the precise positions.
For consistent spacing between elements, utilize a measuring tape to mark intervals—typically 2 to 4 inches apart—thereby promoting symmetry and enhancing overall visual harmony.
- Verify all alignments with the level to avoid any unintended tilts that might compromise the aesthetic quality.
- Employ a stud finder to identify secure mounting points, which is particularly important for supporting heavier items and preventing damage to the wall.
This systematic methodology, supported by research in spatial perception from the Journal of Interior Design, results in precise and visually appealing arrangements that engage viewers, fostering self-expression, without dominating the space.
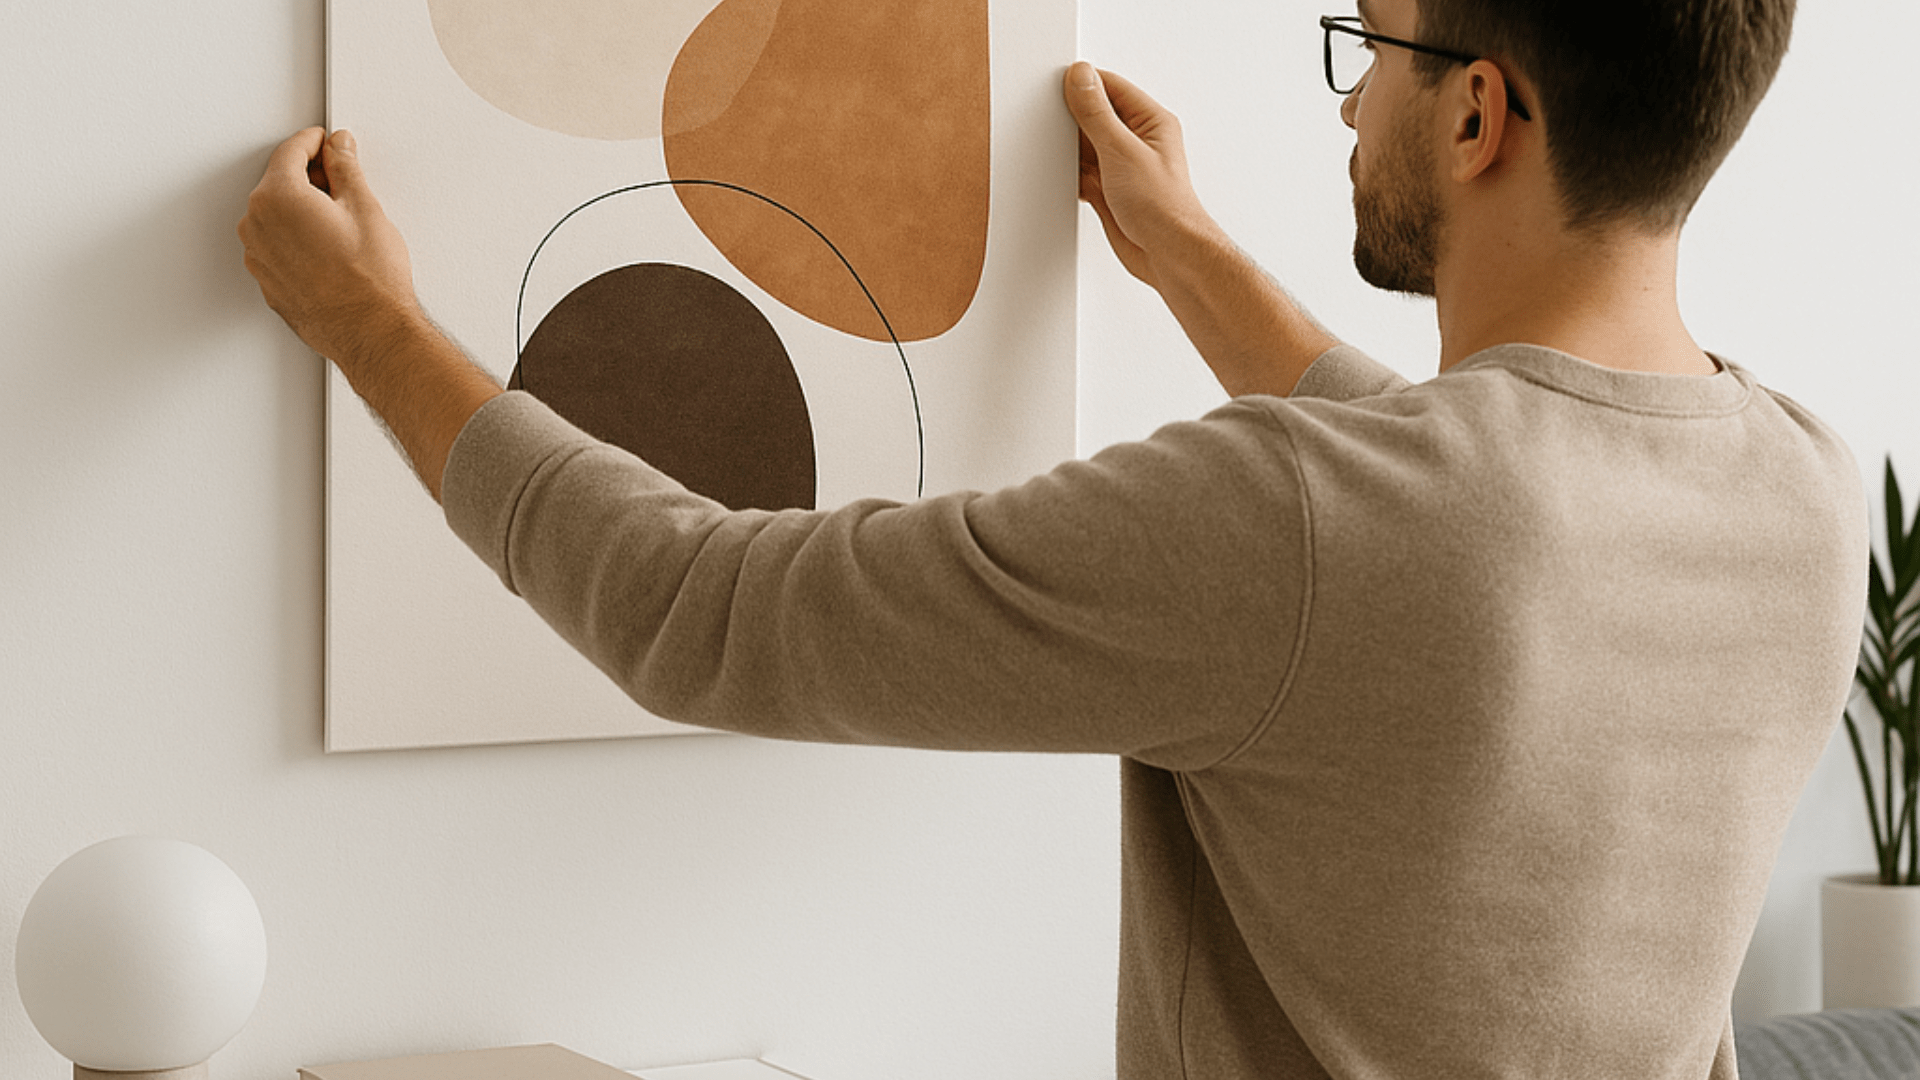
How to Hang Unframed Canvas Using Adhesive Hooks
Utilizing adhesive hooks to hang unframed canvases offers a non-damaging alternative, particularly suitable for renters and individuals prioritizing adaptability. This technique employs reliable products such as Command Strips or hook-and-loop fasteners like Velcro to achieve secure mounting without the need for nails. It is particularly well-suited for lightweight canvas prints from sources like Tribeca Printworks by artists such as Laura Gardiner, facilitating straightforward installation across diverse wall surfaces while preserving the contemporary appeal of frameless artwork.
- To implement this method effectively, first select adhesive hooks that are appropriately rated for the weight of the canvas.
- Adhere strictly to the manufacturer's instructions by applying the adhesive strips uniformly to both the reverse side of the canvas and the corresponding wall location.
- Ensure a firm press to promote adhesion, and permit the specified curing period to elapse.
- This procedure not only safeguards the structural integrity of the walls but also enables effortless repositioning, aligning with prevailing 2023 trends in minimalist aesthetic and adaptable interior design solutions, as noted in the Home Decor Trends Survey.
Step-by-Step Guide for Adhesive Hooks
Adhere to this step-by-step protocol for installing adhesive hooks: thoroughly clean the surface, affix the adhesive strips to the canvas backing, apply the hook to the wall, and allow the specified duration prior to suspending the artwork.
To achieve a secure and non-damaging installation, particularly for delicate canvas pieces, select hooks appropriately rated for the artwork's weight. Research conducted by 3M, the manufacturer of Command Hooks, demonstrates that these hooks can support up to 7.5 pounds per hook on smooth surfaces, with no residue upon removal.
- Clean the surface: Wipe the wall using isopropyl alcohol and a microfiber cloth to eliminate dust and oils, permitting it to dry completely for optimal adhesion. Refrain from using textured or recently painted walls, in accordance with manufacturer recommendations, to avert potential peeling.
- Attach strips to the canvas back: Remove the protective liner from the adhesive side, position the strips uniformly on the rear of the frame, and apply firm pressure for 30 seconds. This meticulous procedure reduces the risk of slippage and promotes balanced weight distribution.
- Press onto the wall: Detach the liner from the hook side, align precisely with a level, and maintain pressure for an additional 30 seconds. Safety precaution: Utilize gloves when managing heavier items to prevent physical strain.
- Wait for the recommended time: Permit at least one hour—or 24 hours in conditions of high humidity—before applying weight, thereby allowing the adhesive to form a robust bond and minimizing the possibility of failure.
Observing these protocols enhances durability and facilitates straightforward repositioning, as substantiated by research from the Adhesive and Sealant Council and insights from Interior Design Trends Quarterly regarding best practices in bonding applications.
How to Hang Unframed Canvas with Sawtooth Hangers
Hanging unframed canvas artwork utilizing sawtooth hangers represents a conventional yet straightforward approach to achieving secure wall mounting, inspired by SoHo gallery styles. This method entails affixing sawtooth hangers or D-rings to the canvas frame, followed by inserting nails with a hammer. Frequently augmented with wire for enhanced stability, this technique is particularly suitable for heavier canvases and serves as a dependable alternative to adhesive solutions, thereby preserving the inherent lightweight elegance of canvas pieces within interior design schemes.
- Position the hangers symmetrically on the reverse side of the canvas, ensuring alignment with its center of balance.
- Subsequently, mark the corresponding wall locations and drive nails into place at an optimal eye-level height to facilitate level suspension.
- This approach is well-suited for gallery wall configurations, accommodating inventive arrangements while providing robust resilience to routine household activities.
Attaching and Installing Sawtooth Hangers
The installation of sawtooth hangers involves securing them to the back of the canvas using screws or adhesive, followed by affixing them to the wall with nails hammered into place to achieve stable support.
To achieve even placement, measure the width of the canvas and position the hangers symmetrically, approximately two inches from the top edge, with equal spacing on both sides. This approach prevents tilting and enhances overall stability, as uneven weight distribution may cause the artwork to lean over time.
- Commence by marking the precise locations on the back of the canvas using a pencil.
- When using screws, drill small pilot holes to prevent damage to the frame; for adhesive, select a heavy-duty product rated for a minimum of 10 pounds per square inch.
- On the wall, employ a stud finder to identify structural studs for optimal security, or utilize wall anchors in drywall installations for artworks weighing more than 20 pounds.
For safety during installation, wear protective eyewear when hammering and verify the stability by gently lifting the artwork. According to the guidelines established by the American Alliance of Museums and featured in Art and Home Magazine, adherence to proper installation procedures can reduce the risk of accidents by up to 40%, thereby maintaining a secure and aesthetically balanced display.
| Material | Load Capacity | Best For |
|---|---|---|
| Screws | Up to 50 lbs | Wooden frames |
| Glue | Up to 30 lbs | Light canvases |
| Wall Anchors | Over 20 lbs | Drywall |
How to Hang Unframed Canvas Using Clips or Strips
Utilizing clips or adhesive strips, such as binder clips, washi tape, or double-sided tape, offers innovative and non-permanent solutions for suspending unframed canvases, thereby displaying artwork without the need for fixed installations. This technique is particularly suitable for lightweight pieces in leased properties or when testing various arrangements, facilitating straightforward modifications to align with contemporary minimalist design principles that encourage Buy Wall Art options.
Clips may be affixed along the upper edge to achieve a relaxed presentation, while tape ensures unobtrusive attachment; consistent application of pressure is essential to prevent any drooping. Recognized as a prominent trend in 2023 for its adaptability, this method promotes personalized interior styling, safeguards wall surfaces from harm, and remains approachable for individuals of varying expertise in residential improvement initiatives.
Best Practices for Clip Methods
Best practices for clip methods entail the utilization of high-quality binder clips or washi tape to ensure even weight distribution and prevent slippage on the wall surface.
To achieve long-lasting results, it is imperative to prepare the surface meticulously by cleansing it with a mild detergent and permitting it to dry fully, thereby eliminating dust and oils that may undermine adhesion. For enhanced durability, layering washi tape with multiple strips is advisable to support heavier items, as research from the American Society for Testing and Materials (ASTM) indicates that appropriate surface preparation can augment hold strength by up to 30%.
- Select clips featuring non-marring vinyl coatings to preserve the aesthetic integrity of the wall, thereby avoiding scratches upon removal.
- Position clips at diagonal corners to achieve balanced tension, which promotes both stability and visual harmony.
- For temporary displays, choose removable washi tape variants, which, per evaluations in Consumer Reports magazine, adhere cleanly without residue in 95% of applications.
These procedures not only facilitate secure mounting but also preserve the wall's pristine condition, rendering them particularly suitable for renters or individuals who frequently redecorate.
What Are Tips for Secure and Level Hanging?
To ensure the secure and level hanging of unframed canvas artwork, it is advisable to employ a level tool to confirm alignment and to mark the positions with a pencil at eye-level height, thereby optimizing visibility within any interior space.
Selecting hardware, such as D-rings or Sawtooth Hangers, that is appropriate for the artwork's weight is essential for secure attachment. For multi-panel arrangements, careful consideration of the layout is recommended to achieve balanced and harmonious decor.
Conducting regular inspections for stability helps mitigate potential accidents, while strategic height placement amplifies the artwork's prominence as a focal statement piece.
These recommendations, derived from expert guidance featured in Art and Home Magazine, foster the longevity and aesthetic cohesion of home environments, promoting self-expression., in accordance with 2023 trends from the Home Decor Trends Survey and Interior Design Trends Quarterly emphasizing precision and intentionality in interior design.
How to Ensure Straight Alignment
To achieve precise alignment, employ a level placed across the top of the canvas following the initial pencil markings. Adjust as necessary until the canvas is perfectly horizontal at the intended height.
Once alignment is confirmed, validate the positioning by retreating several feet to evaluate the overall visual equilibrium. Typical modifications involve subtly tilting the frame should the level indicate minor discrepancies, or relocating wall hooks for heavier artworks to ensure even weight distribution.
Experts frequently advise the use of picture hanging wire specifically rated to support the canvas's weight, thereby promoting long-term stability and preventing sagging.
- For enhanced accuracy in expansive areas, particularly where walls may be irregular, conduct a secondary verification using a laser level, as conventional bubble levels can prove less reliable.
- In configurations involving multiple canvases, preserve uniform spacing—ordinarily 1 to 2 inches—through the application of spacers or precise measurements with a tape measure.
As outlined in the guidelines of the American Alliance of Museums, meticulous verification is crucial to avert potential long-term issues, such as frame distortion. When positioning artwork above furniture, center it at eye level, approximately 57 to 60 inches from the floor, to facilitate optimal viewing.
These techniques deliver results commensurate with professional standards, effectively elevating any space to resemble a curated gallery.
| Verification Method | Common Adjustment | Benefit |
|---|---|---|
| Bubble Level | Tilt frame | Quick horizontal check |
| Laser Level | Reposition hooks | Accurate for distances |
| Eye-Level Assessment | Adjust height | Enhances aesthetics |
What Common Mistakes Should You Avoid When Hanging Unframed Canvas?
It is advisable to avoid common errors when hanging unframed canvases, such as exposing them to direct sunlight or high-moisture environments, which may lead to warping or fading, as well as failing to ensure proper weight distribution for a secure installation.
One must also be vigilant regarding uneven placement, which can result in the canvas tilting or sagging over time and compromising the artwork's structural integrity. Research conducted by the Getty Conservation Institute indicates that improper hanging techniques account for approximately 30% of reported deteriorations among canvases in residential settings.
To mitigate these risks, it is essential to measure the installation site meticulously and employ a level tool to achieve precision.
- Refrain from using inadequate hardware, such as Washi Tape or Binder Clips for heavier artworks, insufficiently robust hooks or nails that may buckle under the canvas's weight; instead, select heavy-duty anchors rated to support at least 50 pounds, in accordance with standards established by the American Society for Testing and Materials (ASTM).
- Verify that the wall surface is clean and dry prior to installation to enhance adhesion and minimize the potential for mold development in humid conditions.
- For oversized artworks, it is recommended to engage professional installers to maintain equilibrium and honor the artist's intended presentation.
By proactively addressing these potential pitfalls, individuals can preserve their unframed canvases for extended periods, thereby sustaining the enduring aesthetic and cultural significance of visual art.
How to Remove and Rehang Unframed Canvas Art
Removing and rehanging unframed canvas art can be accomplished efficiently using adhesive solutions such as Command Strips, which facilitate gentle removal without leaving residue, thereby providing flexibility for updating decor arrangements.
To prevent damage, it is advisable to hold the canvas securely and pull the removal tab slowly downward at a 180-degree angle, as recommended by 3M, the manufacturer of Command products. This method reduces stress on both the wall surface and the artwork, thereby minimizing the risk of tears or marks.
Research conducted by the American Society for Testing and Materials (ASTM) demonstrates that such hooks can support up to 7.5 pounds without causing surface damage when applied and removed according to instructions.
- Clean the wall and the back of the canvas with rubbing alcohol to eliminate dust and ensure optimal adhesion.
- Apply new strips to the corners, pressing firmly for 30 seconds to establish a secure bond.
- Allow one hour before rehanging to permit the adhesive to set fully, which is particularly beneficial in dynamic environments such as rental apartments or home offices.
This approach to repositioning enables effortless seasonal refreshes of arrangements, allowing for the transformation of living spaces without the need for professional assistance.
Alternatives to Hanging Unframed Canvas Art
Alternatives to traditional hanging methods for canvas art include leaning pieces on shelves, arranging a gallery wall with mixed media elements, or employing easels. These techniques are recommended by Tribeca Printworks and artist Laura Gardiner, as featured in SoHo-inspired designs from the 2023 edition of Art and Home Magazine, providing ideas on how to buy wall art.
Freestanding displays provide greater flexibility in art presentation, permitting relocation of pieces without damaging walls. Sculptural bases or minimalist stands that align with a minimalist aesthetic, inspired by contemporary gallery installations such as those at the Museum of Modern Art (MoMA), enable canvas works to stand independently on consoles or floors, facilitating adaptations to seasonal decor changes.
Digital integrations offer additional dynamic options; for example, smart screens or augmented reality (AR) applications can superimpose virtual art onto physical environments, thereby increasing interactivity. A 2021 study in the Journal of Interior Design indicates that such technologies enhance viewer engagement by 40%, based on findings from Stanford's Human-Computer Interaction Lab.
- Freestanding: Acrylic risers that provide sleek, shadow-free elevation.
- Digital: Projectors that synchronize with applications such as TouchCut for seamless projections.
How To Organize Kitchen Cabinets ?
How to Decorate a Living Room That Feels Luxurious (Even on a Budget)