Transforming a room with paint can revitalize a space; however, many DIY enthusiasts proceed without a comprehensive DIY plan. There is no need to risk an unattractive finish or an uneven application. Regardless of whether one uses a brush or a roller, understanding the appropriate tools, techniques, and types of paint is essential for achieving optimal results in your painting project. From preparing the walls to mastering the cutting-in technique and avoiding common errors, this guide will provide you with all the necessary information for a flawless paint job in your home. Do not allow your walls to remain uninspired—let us begin this painting process.
What Are the Steps to Paint a Room?
Painting a room is a rewarding DIY project that can significantly enhance the ambiance and design of a home, resulting in a more visually appealing and comfortable environment, allowing you to express your personal style.
The process entails several critical steps, beginning with the gathering of necessary supplies, which include paint, primer, brushes, rollers, drop cloths, and various other interior painting tools to ensure quality coverage.
Proper preparation of the room is essential for achieving a high-quality finish; this includes cleaning surfaces, addressing any damage, and selecting the appropriate color for the walls to align with the desired mood.
Furthermore, assessing costs and managing the budget effectively will contribute to a successful painting project.
What Tools and Materials Do You Need?
To initiate your painting project, it is imperative to gather the appropriate tools and materials that will facilitate a seamless process and yield an aesthetically pleasing finish.
Recognizing the significance of each item in your toolkit can significantly influence the outcome of the task. Below is a list of essential tools and materials to consider:
- Brushes: A selection of brushes, including angled, flat, and round varieties, serves distinct purposes. Each brush type is suitable for specific applications; for example, an angled brush excels at cutting in around edges, while a flat brush effectively covers larger surfaces.
- Rollers: Paint rollers, particularly those with varying nap lengths, are instrumental in achieving smooth finishes over extensive areas efficiently. A thicker nap captures more texture, making it particularly advantageous for uneven surfaces.
- Paint Types: The selection of appropriate paint is critical. Latex paint is water-based, dries rapidly, and is frequently chosen for interior walls, whereas oil-based paint offers a durable finish and is commonly utilized for trim and outdoor applications.
- Primer: A high-quality primer not only prepares surfaces for painting but also enhances the longevity of the paint job by ensuring proper adhesion.
- Drop Cloths: It is essential to protect floors and furniture with drop cloths; opting for canvas or plastic ensures easy cleanup and minimizes the risk of unwanted paint drips.
Having these tools and materials readily available will undoubtedly enhance the painting experience, allowing you to concentrate on creating a space that reflects your personal style.
How to Prepare the Room for Painting?
Preparing a room for painting is a critical step in achieving a flawless finish. This process entails thorough cleaning, surface repair, and the adequate protection of furniture.
To initiate this essential procedure, one should first remove all furniture from the room or, at a minimum, relocate it to the center and cover it with drop cloths to prevent any accidental stains. Subsequently, the following steps should be undertaken:
- Remove wall hangings, including paintings and mirrors, to ensure the area is completely clear.
- Utilize a vacuum or a damp cloth to clean all surfaces, ensuring that dust and debris do not interfere with the paint application.
- It is also imperative to inspect the walls for any signs of moisture, as this may adversely affect the adhesion of the paint.
- Any visible damage, such as cracks or holes, should be repaired using spackle or drywall compound to create a smooth surface for the impending application of color.
By diligently following these steps, the room can be transformed into an optimal environment for a successful painting endeavor, enhancing both the mood and design of your space.
What Are the Different Types of Paint?
Understanding the various types of paint available is essential for any interior painting project, as it significantly impacts both the aesthetics and durability of the finish. The primary categories of paint consist of latex and oil-based options, each possessing distinct properties and applications that are suited to specific surfaces and desired outcomes.
Latex paint, recognized for its quick drying time and ease of cleaning with soap and water, is ideal for most interior walls. Conversely, oil-based paint provides superior sheen and durability, making it suitable for surfaces that are subject to wear and moisture.
Familiarity with these types of paint will enable individuals to make informed decisions that align with their budgetary considerations and design objectives, ensuring that the selected paint complements their desired ambiance.
What Is the Difference Between Oil-Based and Water-Based Paint?
The primary distinction between oil-based and water-based paints resides in their composition, application methods, and drying times, which can significantly affect the outcomes of any painting project.
In selecting the appropriate paint for a project, it is crucial to recognize that oil-based paints are generally formulated with organic solvents, rendering them durable and well-suited for high-traffic areas. These paints provide a rich, glossy finish and adhere effectively to surfaces, ensuring longevity. However, the extended drying times associated with oil-based paints may delay the overall completion of the project.
Conversely, water-based paints are characterized by their quicker drying times, facilitating faster re-coating and reducing wait times between coats. They are also easier to clean with soap and water, making them a more convenient option for many do-it-yourself enthusiasts.
Benefits of Oil-Based Paint:
- Superior durability
- Glossy finish
- Excellent adhesion
Benefits of Water-Based Paint:
- Quick drying times
- Easy clean-up
- Lower VOC emissions
Selecting the appropriate type of paint for specific surfaces, such as wood or drywall, can significantly influence the project's outcome, ensuring optimal aesthetic appeal and functionality.
How to Choose the Right Paint Finish?
Selecting the appropriate paint finish is crucial for achieving the desired ambiance and visual effect within a space, as different sheens can significantly alter the appearance of walls.
Each type of finish possesses distinct characteristics that cater to specific room functions and aesthetic preferences. For example, matte finishes provide a non-reflective surface, making them ideal for ceilings or low-traffic areas, as they effectively conceal imperfections. In contrast, an eggshell finish introduces a subtle sheen, rendering it suitable for living rooms and dining areas, where gentle light reflection can enhance warmth without overwhelming the atmosphere.
- Satin finishes offer a balanced solution, combining durability and washability, which makes them particularly well-suited for hallways and children's rooms.
- Semi-gloss finishes are commonly utilized in kitchens and bathrooms due to their moisture resistance and ease of cleaning.
- Finally, gloss finishes produce a brilliant shine, making them ideal for intricate moldings and furniture, thereby accentuating architectural details.
Understanding the impact of each finish on light reflection, durability, and maintenance enables homeowners to make informed decisions, ensuring that the chosen paint aligns with both functional requirements and aesthetic aspirations.
How to Apply Paint Effectively?
Effectively applying paint necessitates a comprehensive understanding of various painting techniques and tools to ensure the attainment of a smooth and professional-looking finish on walls, enhancing the overall visual appeal of the room.
What Techniques Should You Use for Cutting In?
Cutting in is a painting technique employed to create clean, sharp lines at the edges of walls and ceilings, and it is essential for achieving a professional finish. This method not only enhances the overall aesthetic appeal but also prevents unwanted paint from bleeding into adjacent areas, such as trim or neighboring walls.
To master the art of cutting in, one may consider the following essential tips for more effective brush application:
- Choose the right brush: A high-quality angled brush is recommended, as it allows for improved control and precision.
- Load the brush correctly: Dip the brush in paint approximately one-third of the way, and tap off any excess paint to avoid drips.
- Use steady strokes: Begin from the corner and move at a consistent speed, gently guiding the brush along the edge.
- Maintain a wet edge: Overlap slightly with previously painted sections to ensure a smooth and uniform finish.
By concentrating on these key techniques, the cutting-in process becomes not only more manageable but also more effective, resulting in fewer touch-ups and an overall polished appearance after repairs.
How to Use a Roller for Painting Walls?
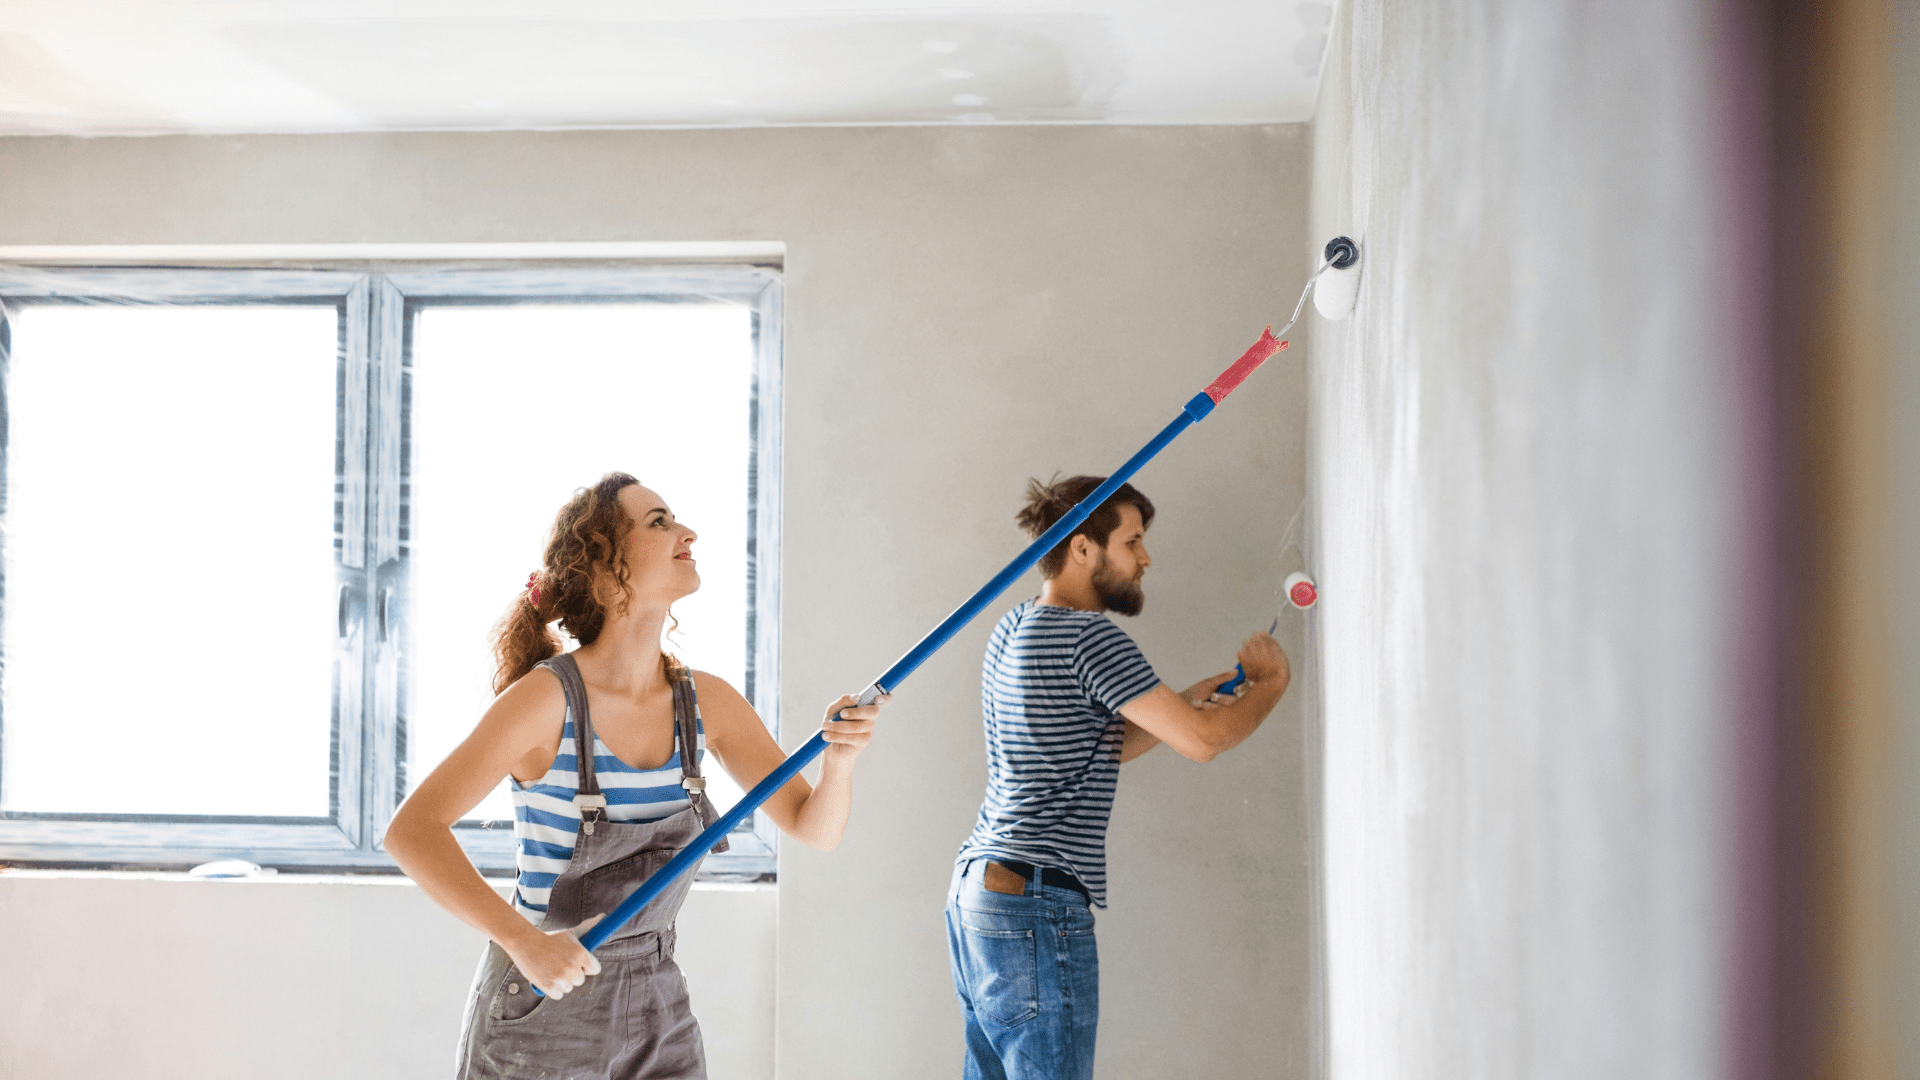
Employing a roller for wall painting is a highly effective method and cleaning materials for achieving rapid coverage and a smooth finish across expansive surfaces.
To ensure optimal results, it is crucial to understand the proper loading technique for the roller. Begin by immersing the roller into the paint tray, allowing it to absorb the paint adequately. Once saturated, remove any excess paint by gently rolling the roller on the tray’s ribbed surface. This step is essential to prevent drips and ensure an even application. When applying paint, it is important to maintain consistent pressure while rolling, proceeding from the top to the bottom of the wall in a smooth, overlapping manner.
- For textured surfaces, it is advisable to use a thicker nap roller, as it holds more paint and navigates uneven areas effectively.
- For flat walls, a shorter nap roller is sufficient, providing a crisp finish without excess paint.
It is important to resist the urge to rush the process in order to achieve the best results and standards. Always work in manageable sections to maintain a wet edge, thus preventing unsightly lap marks.
What Is the Best Way to Paint Corners and Edges?
Painting corners and edges necessitates a careful technique and recommendations to ensure seamless transitions and to avoid uneven lines between different surfaces.
To achieve optimal results, one of the best practices is to utilize painter's tape, which effectively protects adjacent surfaces from unwanted paint splatters and lines.
When applying tape, it is important to align it meticulously along the edge to promote clean results. This technique not only enhances the overall aesthetics but also minimizes cleanup time.
Employing a high-quality angle or trim brush, recognized for its tapered head, can significantly enhance the precision of strokes. Given that corners and edges often present intricate details, maintaining a steady hand is essential. The following tips should be considered:
- Use a small brush for tight corners and intricate details.
- Apply paint in thin layers of paint to prevent drips.
- Remove the tape while the paint is still wet to achieve crisp lines.
By adhering to these guidelines, one can achieve a polished and professional-looking finish in any DIY painting project.
How to Ensure a Smooth Finish?
Achieving a smooth finish in a painting project is critical for a professional appearance. This outcome necessitates meticulous consideration of application techniques, drying times, and the selection of appropriate products.
What Are the Tips for Avoiding Brush Marks?
Avoiding brush marks is essential for achieving a flawless finish, and several techniques can assist in minimizing or eliminating these imperfections.
Selecting the appropriate brush is a critical first step. It is advisable to choose high-quality brushes that are specifically designed for the type of paint being utilized; for example, natural bristle brushes are effective with oil-based paints, while synthetic brushes are more suitable for water-based options. Additionally, employing a good-quality roller can aid in achieving a smooth application over larger areas.
When applying paint, it is important to use long, even strokes and to refrain from overworking any small section to prevent areas from drying out. Another effective technique for achieving a seamless appearance is to maintain a wet edge, which involves overlapping wet paint with the brush with each stroke. Furthermore, it is crucial not to overload the brush with paint, as this can result in unsightly drips and uneven coats.
By adhering to these guidelines, one can significantly enhance painting results and achieve the professional finish desired.
How to Properly Clean Brushes and Rollers?
Proper cleaning of brushes and rollers after use is critical for maintaining their quality and longevity, thereby ensuring optimal performance in future painting projects. Regular maintenance not only extends the life of these tools but also enhances the overall finish of paintwork, preventing unsightly streaks or imperfections that may arise from using inadequately cleaned equipment.
To achieve the best results, the cleaning process varies based on whether oil-based or water-based paints were used. The following steps are recommended for each type:
For Water-Based Paints:
- Immediately rinse brushes and rollers in warm water to remove excess paint.
- Use warm soapy water with a mild detergent to thoroughly wash the bristles or rollers, ensuring that all paint is effectively removed.
- Rinse again with clean water and reshape the brush bristles to their original form.
- Allow them to air dry flat on plywood or hang them up to prevent deformation.
For Oil-Based Paints:
- Begin by wiping off as much excess paint as possible with a rag.
- Submerge brushes and rollers in an appropriate solvent, such as mineral spirits or paint thinner, to dissolve the paint.
- Gently comb through the bristles with your fingers to remove any trapped paint particles.
- Follow up with soap and warm water for a final cleaning, then rinse thoroughly.
- Dry them as previously mentioned, ensuring they retain their shape.
This comprehensive cleaning process ensures that painting tools remain in optimal condition, ready for the next project.
What Are Common Mistakes to Avoid When Painting?
When undertaking a painting project, awareness of common mistakes can save significant time, effort, and resources, ultimately leading to a more successful outcome.
It is essential for individuals involved in painting to recognize that proper preparation guidelines is the foundation of a flawless finish. Frequently, individuals rush into the application process without adequately preparing the surface, which can result in a range of issues, including peeling and uneven texture.
Selecting the incorrect type of paint for a specific project can lead to dissatisfaction regarding both durability and aesthetic appeal and dimensions. For instance, using exterior paint indoors may produce unnecessary fumes and complications. Additionally, it is vital to adhere to the recommended drying times between coats. Failure to do so can compromise the integrity of the paint and necessitate rework.
Key points to consider include:
- Inadequate surface preparation can lead to peeling.
- Choosing the wrong paint can adversely affect durability.
- Not allowing adequate drying times may result in compromised finishes.
By avoiding these pitfalls, individuals can ensure that their painting endeavors meet expectations and withstand the test of time.
How to Maintain Your Painted Walls?
Maintaining painted walls in the bedroom is essential for preserving their appearance and longevity. This process requires regular cleaning and prompt touch-ups as necessary.
What Cleaning Methods Are Safe for Painted Walls?
Utilizing safe cleaning methods for painted walls is crucial to prevent damage to the paint and to uphold the integrity of the finish. Selecting appropriate cleaning products can significantly extend the lifespan of the paint and ensure that walls remain vibrant and fresh, thereby preserving the overall aesthetic appeal of the room.
To effectively clean painted walls without risking damage, it is important to adhere to several strategies:
- Begin with a soft cloth: Microfiber cloths are particularly effective as they attract dirt without scratching the surface.
- Dilute mild soap: Mixing a small amount of dish soap with warm water creates a gentle cleaning solution that can remove grime without the use of harsh chemicals.
- Employ vinegar: A solution of equal parts vinegar and water can assist in lifting stains and odors without compromising the finish.
For more stubborn stains, using a non-abrasive sponge with the cleaning solution can effectively address dirt while minimizing concerns regarding potential paint damage. By keeping these cleaning methods in mind for safety., individuals can ensure that their walls remain in excellent condition and retain their intended appearance.
How to Touch Up Scratches and Marks on Painted Surfaces?
Touching up scratches and marks on painted surfaces is a straightforward yet effective method for maintaining the aesthetics of walls and ensuring they appear pristine. To achieve successful results, it is essential to employ a systematic approach that guarantees an optimal finish and precise color matching.
The following steps outline the procedure for a seamless touch-up:
- Assess the Damage: Begin by gauging the severity of the scratches or marks. Minor blemishes can often be addressed easily, while larger areas may necessitate more comprehensive attention.
- Select the Right Paint: Identify a paint sample that closely resembles the existing wall color. Most hardware stores provide paint-matching services to assist in selecting an exact shade.
- Gather Your Tools: Prepare the workspace with the necessary supplies, including a small paintbrush or roller, painter's tape, and a clean cloth for any potential spills.
- Prepare the Surface: Ensure the area is clean and dry. Wipe down the surface to eliminate dust or grease, as these contaminants can impede adhesion.
- Apply the Paint: Using the brush or roller, apply the paint gently over the scratched area. Feather the edges to blend the touch-up with the surrounding surface.
- Finishing Touches: Once the paint has dried, inspect the touch-up and apply additional layers if necessary to achieve optimal coverage.
By adhering to this methodology, individuals can attain a professional-looking touch-up, ensuring walls remain aesthetically pleasing and well-maintained.
What Are the Safety Precautions When Painting a Room?
Implementing safety precautions is imperative when painting a room, as exposure to chemicals and fumes can present significant health risks. Adhering to established guidelines is essential to ensure personal protection during this process.
How to Ventilate the Room While Painting?
Ventilating the room while painting is essential for minimizing harmful fumes and ensuring a safer working environment, thereby enhancing air quality.
Implementing proper ventilation techniques not only contributes to an optimal atmosphere but also improves the overall efficacy of the painting process. One of the most straightforward and effective methods is to open windows, facilitating the influx of fresh air. If conditions permit, utilizing large fans to promote airflow throughout the space is advisable. Strategically positioning the fans near windows can facilitate:
- Cross-ventilation
- Displacement of stagnant air
- Reduction of the concentration of volatile organic compounds (VOCs) that are commonly released during the painting process.
Another effective approach is to employ specialized air purifiers designed to filter out harmful particles, thereby enhancing indoor air quality. Ensuring continuous air circulation while working significantly contributes to safety and comfort, ultimately resulting in a more pleasant and successful painting experience.
What Personal Protective Equipment Should You Use?
The use of personal protective equipment (PPE) is essential for ensuring safety during painting activities, as it helps to protect against hazardous chemicals and accidents throughout the process.
When undertaking painting projects, it is crucial to acknowledge the various hazards present, including exposure to harmful fumes and potential skin irritants. Therefore, equipping oneself with the appropriate gear is not merely advisable; it is a fundamental requirement for every painter, whether amateur or professional. The correct safety equipment can significantly mitigate health risks and foster a more efficient working environment.
- Respiratory Masks: This equipment filters out harmful particles and vapors, thereby safeguarding the respiratory system.
- Goggles: Protecting the eyes from paint splatters and toxic chemicals is vital for maintaining long-term vision health.
- Gloves: Durable gloves serve to shield the skin from chemical exposure and paint residue, which may cause irritation.
- Coveralls: Wearing coveralls assists in keeping clothing clean and provides an additional layer of protection against splashes.
Incorporating these essential items into one’s painting routine not only complies with safety regulations but also enhances the overall painting experience, making it more enjoyable and worry-free.
Frequently Asked Questions
How To Paint A Room ?
To paint a room, start by gathering your supplies, which include paint, brushes, rollers, painter's tape, drop cloths, and a paint tray. Next, prepare the room by removing furniture, covering the floor, and taping edges. Then, apply a primer if necessary, and finally, start painting from the ceiling down to the walls, using even strokes for a smooth finish.
What preparation is needed before learning How To Paint A Room ?
Before learning how to paint a room, you should prepare by clearing the space of furniture, cleaning the walls, repairing any holes or cracks, and taping around windows, doors, and baseboards. Additionally, choose the right type of paint and gather your tools to ensure a smooth painting process.
How To Paint A Room without making a mess?
To paint a room without making a mess, cover all floors and furniture with drop cloths. Use painter's tape to protect edges and trim, and take your time when applying paint to avoid drips. Always have a damp cloth nearby to quickly clean up any accidental spills.
How To Paint A Room in a single day?
To paint a room in a single day, plan ahead by selecting your paint colors and gathering all necessary supplies beforehand. Start early in the day, and if possible, use a paint with a one-coat coverage. Work methodically, focusing on one wall at a time, and take short breaks to maintain your energy.
What tools do I need to know How To Paint A Room effectively?
To effectively learn how to paint a room, you will need essential tools such as paintbrushes, rollers, a paint tray, drop cloths, painter's tape, and a ladder. Additionally, having a stir stick and a measuring tape can help you ensure the best results.
How To Paint A Room for the best results?
For the best results when learning how to paint a room, ensure you choose high-quality paint and the right finish for your walls. Apply a primer if necessary, use even strokes with your brush and roller, and allow adequate drying time between coats. Finally, remove painter's tape while the paint is still slightly wet for clean lines.
How To Build Gaming Room ?
How To Clean A Wool Rug ?