
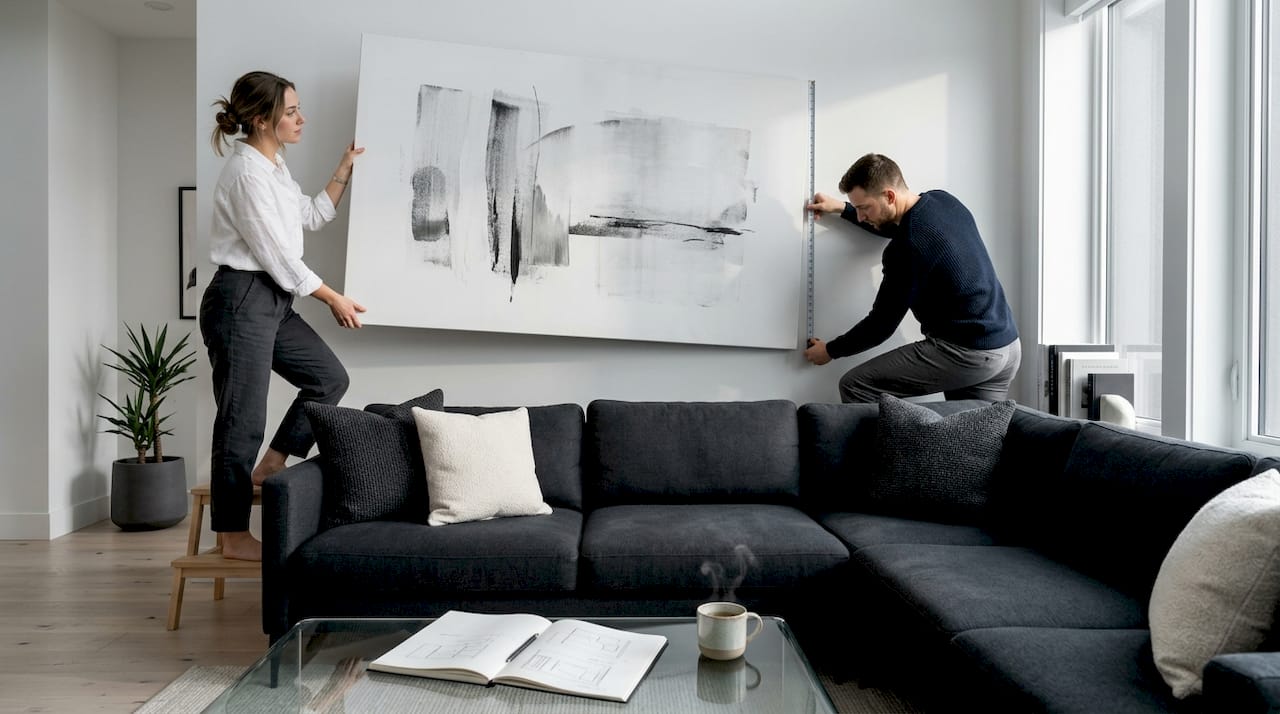
Large art has a way of making or breaking a room. Get the placement right, and a single oversized canvas becomes the most powerful design decision in the space. Get it wrong, and even a stunning piece looks like it’s floating in midair, disconnected from everything around it. These oversized wall art placement best practices exist precisely because large-scale pieces behave differently than standard framed photos. They demand a different set of rules around height, scale, hardware, and visual anchoring. This guide gives you those rules, clearly and specifically.
Table of Contents
- Key takeaways
- 1. Oversized wall art placement best practices start with the 57-inch rule
- 2. Apply the 6-to-8-inch rule above furniture
- 3. Match the art’s width to your furniture
- 4. Treat grouped pieces as one unified artwork
- 5. Choose the right hardware for heavy pieces
- 6. Prepare the wall before you hang anything
- 7. Add rubber bumpers behind the frame
- 8. Avoid the most common placement mistakes
- 9. Use lighting to complete the placement
- My honest take on hanging oversized art
- Ready to find your next statement piece?
- FAQ
Key takeaways
| Point | Details |
|---|---|
| Use the 57-inch center rule | Position the vertical center of your art at 57 to 60 inches from the floor for ideal eye-level viewing. |
| Scale art to furniture width | Oversized art should span roughly 60 to 75 percent of the furniture width below it to look proportional. |
| Use two-point hanging hardware | Pieces over 50 lbs require French cleats or dual hooks to stay level and secure long term. |
| Plan before you drill | Tape a paper template to the wall first to preview placement without creating unnecessary holes. |
| Check stability regularly | Inspect hardware and levelness every few months, especially for very heavy pieces on drywall. |
1. Oversized wall art placement best practices start with the 57-inch rule
The single most referenced guideline in professional art hanging is the 57-inch center standard. The vertical center of your artwork should sit approximately 57 to 60 inches from the floor, which aligns with average human eye level. Museums and galleries use this as their baseline for good reason. It works.
For oversized pieces, though, you need to layer this rule with context. A 72-inch-tall canvas centered at 57 inches would have its bottom edge sitting at just 21 inches off the floor. That might work in some loft-style spaces, but in most homes it feels too low. Adjust upward to 60 inches for very tall pieces, and rarely push the center above 65 inches or the art starts to feel disconnected from the room.
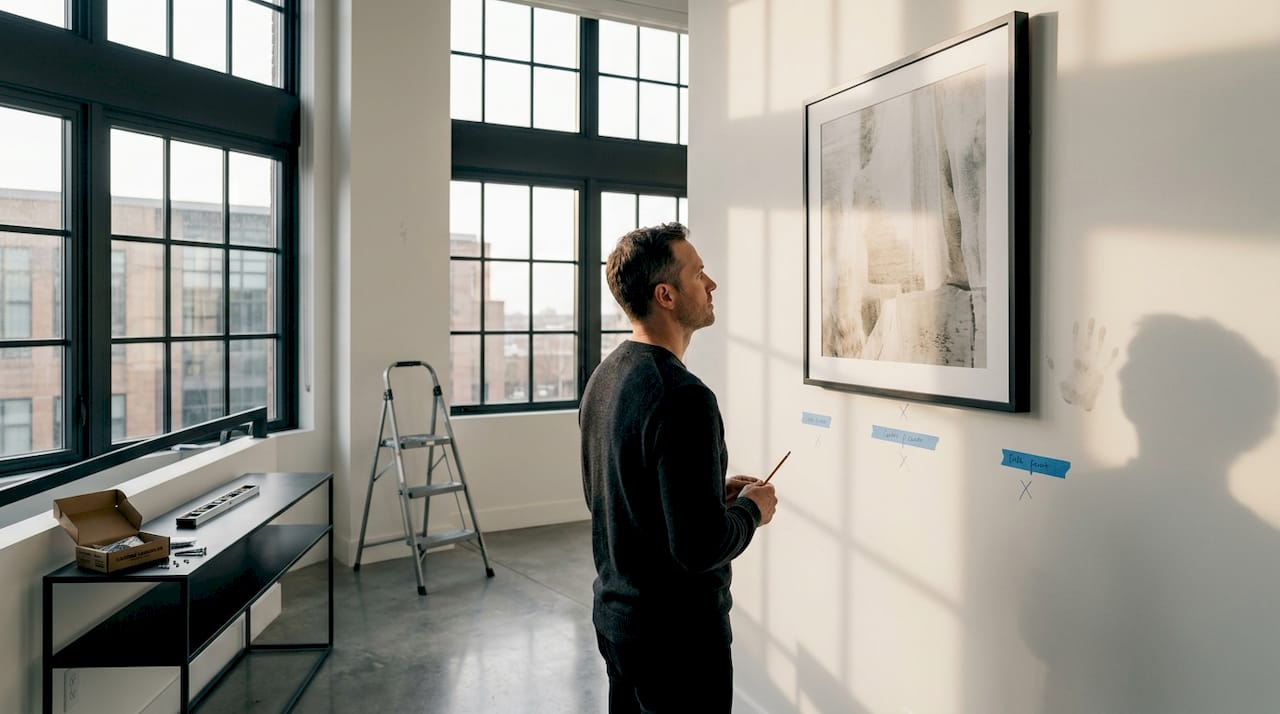
Pro Tip: If your ceilings are higher than 9 feet, shift the center point up to 60 to 63 inches. This keeps the art proportional to the vertical space without letting it float.
2. Apply the 6-to-8-inch rule above furniture
Hanging art above a sofa, bed, or console table is one of the most common placement scenarios, and one of the most commonly done wrong. The gap between the top of your furniture and the bottom edge of the art should fall between 6 and 8 inches. This range creates a visual connection that makes the art and furniture read as a single unit rather than two unrelated objects sharing a wall.
Go tighter than 6 inches and the art feels cramped. Leave more than 10 inches and the piece starts to float. Above a fireplace mantel, the rule tightens slightly. Spacing the bottom edge 4 to 6 inches over the mantelpiece keeps the composition anchored without the art competing with the firebox below.
One detail most people overlook: if your sofa or bed is not centered on the wall, do not center the art on the wall either. Center it on the furniture. The furniture is the visual anchor, not the wall.
3. Match the art’s width to your furniture
Scale is where most amateur placements fall apart. Oversized art that is too narrow above a wide sofa looks like a postage stamp. Art that is wider than the furniture below it overwhelms the arrangement and makes the whole setup feel unstable.
The target range for large canvas art is 60 to 75 percent of the furniture’s width. If your sofa is 84 inches wide, your art should ideally span between 50 and 63 inches. This gives the piece visual weight without overpowering the furniture beneath it.
This proportion rule applies to gallery walls too. If you are grouping multiple pieces, measure the total width of the arrangement, not just individual frames. The collective footprint should still fall within that 60 to 75 percent range relative to the furniture below.
4. Treat grouped pieces as one unified artwork
Gallery-style arrangements with multiple large pieces follow a different logic than single-canvas placement. The key shift in thinking: treat the grouping as a single large artwork, centering the collective visual midpoint at eye level rather than aligning each individual frame at 57 inches.
Spacing between pieces matters just as much as their position on the wall. Keep gaps between frames consistent at 2 to 3 inches. Tighter than 2 inches and the arrangement feels crowded. Wider than 4 inches and the pieces start reading as separate objects rather than a cohesive display.
Pro Tip: Before committing to a layout, cut paper templates to the exact size of each piece and tape them to the wall. Step back, live with it for a day, and adjust. This step alone prevents the majority of placement regrets.
Here is a quick comparison of single-piece versus grouped placement approaches:
| Factor | Single oversized piece | Grouped arrangement |
|---|---|---|
| Center height | 57 to 60 inches | Collective midpoint at 57 to 60 inches |
| Spacing | N/A | 2 to 3 inches between frames |
| Width reference | 60 to 75% of furniture below | Combined width at 60 to 75% of furniture |
| Visual anchor | Single focal point | Treat as one unified composition |
5. Choose the right hardware for heavy pieces
This is where safety and aesthetics intersect. For pieces over 50 lbs, single-point hanging is not sufficient. A single hook or nail creates a pivot point that causes even a well-hung piece to drift and tilt over time. Two-point systems, specifically French cleats or dual D-ring hooks, distribute the weight evenly and keep large art level for years.
Here is how to approach hardware selection based on your wall type:
- Drywall with studs: Use two screws driven directly into studs at the same height. Studs are your strongest anchor point. Locate them with a stud finder before marking anything.
- Drywall without studs at the right position: Use toggle bolts or heavy-duty wall anchors rated well above the artwork’s weight. Standard plastic anchors fail at anything above 15 lbs.
- Plaster walls: Pre-drill carefully to avoid cracking. Use screws with plaster anchors designed for the material.
- Brick or concrete: Masonry anchors and a hammer drill are required. This is the most secure option for very heavy pieces.
Pro Tip: Always buy hardware rated for at least 1.5 times the weight of your artwork. A 40-lb canvas should be hung with hardware rated for 60 lbs minimum. This buffer accounts for vibration, humidity changes, and the physics of leverage.
6. Prepare the wall before you hang anything
Wall preparation is the step most people skip, and it is the step that determines whether a large piece hangs perfectly or drifts within a month. The process takes 15 minutes and saves hours of frustration.
Clean the wall surface where the hardware will go. Dust and residue prevent anchors from seating properly. Mark your hook positions with a pencil, not a marker. Use a level to confirm both points are at exactly the same height before driving anything into the wall.
For wire-hung frames, measure the drop from the top of the frame to the taut wire. Subtract that number from your target center height. That calculation gives you the exact height at which to place your hook. Using wire drop to back-calculate nail placement removes all the guesswork from the process and gets you to perfect alignment on the first try.
7. Add rubber bumpers behind the frame
Once the art is hung, apply small rubber or felt bumpers to the bottom two corners of the frame on the back side. This one detail does three things: it prevents the frame from scratching the wall, it stops the art from tilting when someone brushes against it, and it creates a small air gap that allows air to circulate behind the canvas.
That air circulation matters more than most people realize. Without it, moisture can build up between the canvas and the wall, leading to mold or warping over time. A quarter-inch of clearance from a rubber bumper prevents all of that.
8. Avoid the most common placement mistakes
Most oversized art placement problems fall into a short list of repeatable errors. Knowing them in advance saves you from learning them the hard way.
- Hanging too high. Art hung too high disconnects from the furniture and human scale of the room. If you have to tilt your head back to see the center of the piece, it is too high.
- Ignoring weight distribution. A single hook on a heavy piece will eventually cause tilting. Two-point systems are not optional for large art.
- Skipping the level check. Large art reveals even a one-degree tilt immediately. Always verify level after hanging, not just before.
- Choosing wall color without considering the art. A bold canvas on a similarly bold wall creates visual noise. High-contrast pairings, dark art on a light wall or vice versa, let the piece breathe and command attention.
- Neglecting routine checks. Hardware loosens over time, especially in homes with temperature fluctuations. Check stability every three to four months and tighten as needed.
9. Use lighting to complete the placement
Placement is not just about position on the wall. Lighting is the final variable that determines whether oversized art reads as a deliberate focal point or just a large object on a wall. Picture lights mounted directly on the frame or adjustable track lighting aimed at a 30-degree angle from the ceiling both work well for large pieces.
Avoid positioning art directly opposite a large window. Natural light reflecting off the canvas surface creates glare that washes out the image. If that wall is your only option, use a matte-finish canvas rather than a glossy one, and consider UV-filtering window film to protect the piece from fading.
For decorating with large artwork in rooms with limited natural light, warm-toned LED spotlights at 2700 to 3000 Kelvin bring out depth and color without the harshness of cool white bulbs.
My honest take on hanging oversized art
I have seen more large art hung badly than hung well, and the pattern is almost always the same. People treat a big canvas like a bigger version of a small one and apply the same casual approach. Eyeball the center, hammer a nail, done.
What I have learned is that oversized art is less forgiving than anything else you put on a wall. Every degree of tilt is visible. Every inch of wrong height is noticeable. The pieces that truly transform a room are the ones where someone slowed down, measured twice, used proper hardware, and thought about the furniture relationship before touching a drill.
The height rules are not rigid laws. I have hung pieces at 63 inches in rooms with 11-foot ceilings and it looked right. I have gone lower in compact spaces with low furniture. The rule gives you a starting point. Your eye and the room give you the final answer.
What I will not compromise on is hardware. I have seen a 60-lb canvas pull a drywall anchor out of the wall at 2 a.m. because someone used a plastic anchor rated for 20 lbs. Use toggle bolts. Use French cleats. Use hardware rated for more weight than you think you need. The art is worth it, and so is the wall.
Do not be intimidated by large pieces. They are actually easier to place well than small ones because the scale forces you to be deliberate. That deliberateness is exactly what separates a room that looks designed from one that just looks decorated.
— James
Ready to find your next statement piece?
Now that you know exactly how to place oversized art for maximum impact, the next step is finding a piece worth placing. Luxuryartcanvas carries over 1,000 bold, large-format canvases spanning graffiti, pop art, and high-fashion-inspired designs from names like Louis Vuitton and Chanel. Every canvas is crafted in the USA with materials built to hold their color and structure for years.

Browse the large graffiti wall art collection if you want something with raw energy and street-culture edge. For something with a luxury fashion aesthetic, the Louis Vuitton canvas collection delivers that high-impact look that works especially well as a living room or bedroom focal point. With the placement knowledge from this guide, you will know exactly where to put it before it even arrives.
FAQ
What height should oversized wall art be hung at?
The center of oversized wall art should sit between 57 and 60 inches from the floor, aligning with average eye level. For very tall pieces over 60 inches, raising the center to 63 to 65 inches can improve balance without causing the piece to float.
How far above a sofa should large art hang?
The bottom edge of large art should sit 6 to 8 inches above the top of the sofa. This gap creates a visual connection between the furniture and the artwork, making both elements read as a unified composition.
What hardware do I need for oversized art over 50 lbs?
Pieces over 50 lbs require a two-point hanging system such as French cleats or dual D-ring hooks. Single-point hanging causes heavy art to drift and tilt over time, and standard plastic anchors fail at weights above 15 lbs.
How wide should oversized art be relative to the furniture below it?
Oversized art should span approximately 60 to 75 percent of the width of the furniture beneath it. For an 84-inch sofa, that means the art should be between 50 and 63 inches wide for the best visual proportion.
Should I center oversized art on the wall or on the furniture?
Center the art on the furniture, not the wall. The furniture is the visual anchor in the arrangement. Centering on the wall when furniture is off-center creates an imbalanced composition that draws attention for the wrong reasons.
Creating Focal Walls with Oversized Canvases: A Practical Guide
The Role of Canvas Finish in Wall Decor Appeal