
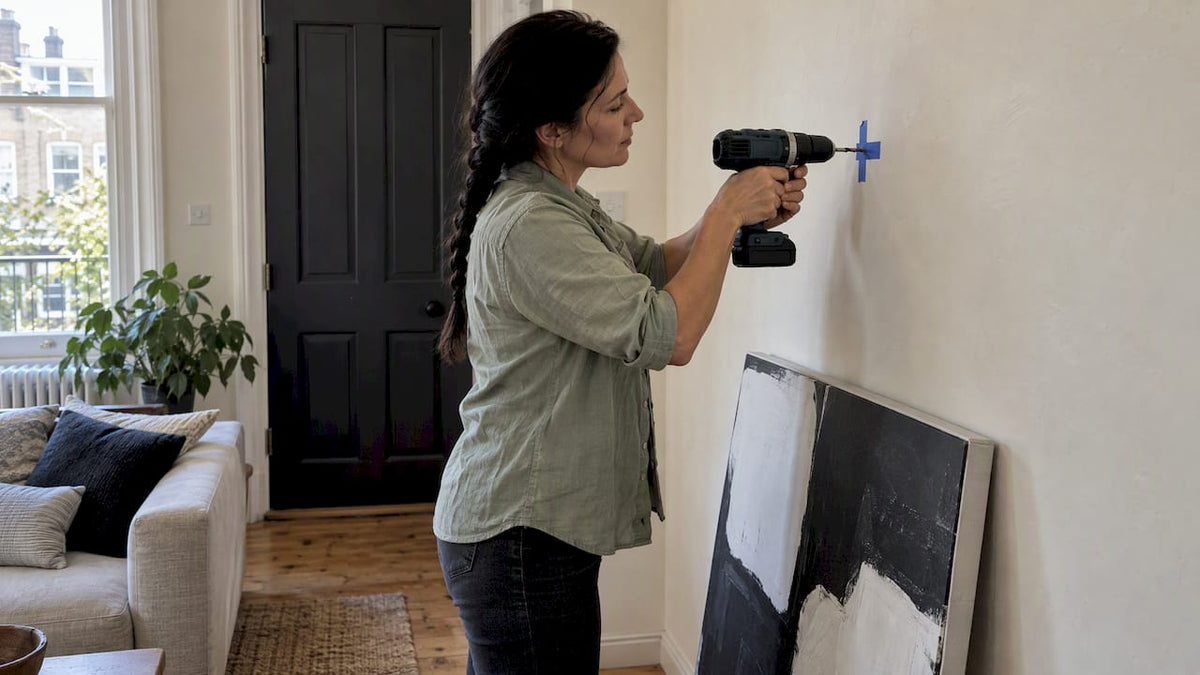
To hang a canvas on plaster, skip the hammer. Match the hardware to the weight of the piece: adhesive hooks for light canvases, plaster picture hooks for mid-weight ones, and molly bolts or a stud for heavy ones. Then make the hole gently, with painter’s tape over the spot and a small pilot hole or a soft tap. Brick and tile need different tools, but the same logic applies: work with the wall’s weak points, not against them.
This guide covers all three surfaces, because people who own a plaster wall often have a brick fireplace or a tiled kitchen a few feet away. It is written for anyone hanging contemporary canvas art, from a first apartment to a restored older home.
Table of Contents
- Why plaster behaves differently from drywall
- Choose your hardware by weight
- How to hang a canvas on plaster, step by step
- When adhesive hooks are the better call
- Heavy canvases: studs, rails and molly bolts
- Hanging a canvas on brick
- Hanging a canvas on tile
- A note on the canvas itself
- Our perspective
- Ready to fill the wall?
- Common mistakes to avoid
- FAQ
Why plaster behaves differently from drywall
Most modern walls are drywall: a gypsum core between sheets of paper. A nail goes in, a small hole is left, and a dab of filler fixes it. Traditional plaster is harder, more brittle and attached differently.
Older plaster walls sit on thin strips of wood called lath. The plaster pushes through the gaps between the strips and hardens into “keys” that hold it in place. According to Family Handyman, hammering a nail into plaster can break those keys, and the plaster can then crumble and crack around the hole. That is why a simple hammer-and-nail job that works fine in a newer house can leave a spiderweb of cracks in an older one.
The practical takeaway: on plaster, the less shock you send through the wall, the better. Every method below is a way of reducing that shock or avoiding the wall’s surface altogether.
Quick check: do you have plaster?
Plaster walls usually feel harder and colder than drywall, and a knock sounds dense rather than hollow. A thumbtack that goes into drywall with thumb pressure will often refuse to enter plaster. If the house was built before the mid-twentieth century, plaster is a safe assumption. When in doubt, test in a spot that will be hidden behind the canvas, such as the exact place you plan to hang it, using the gentlest method first.
Choose your hardware by weight
Before you pick a method, know how heavy your canvas is. Weigh it on a bathroom scale (hold it, then subtract your own weight) or check the product details. Then compare it to the rating printed on the hardware packaging. Designers tend to buy hardware rated well above the real weight of the piece, an approach Architectural Digest highlights, because it leaves a margin for peace of mind.
The figures below come from the guidance of home-improvement publications. Always defer to the rating on the specific product you buy.
| Canvas weight | Suggested hardware on plaster | Why it works |
|---|---|---|
| Very light (up to about 5 lb) | Reversible adhesive hooks | No hole, easy to remove. Homes and Gardens suggests them for items ideally under 5 pounds. |
| Light (under 16 lb) | Adhesive hooks or strips, where the product rating allows | Family Handyman gives this as the ceiling for adhesive options. |
| Medium (under 30 lb) | Plaster picture hook with shock-absorbing nail heads | Spreads and absorbs the impact of the nail, which helps prevent cracking. |
| Heavy | Molly bolt, plaster rail, or a wall stud | Expansion anchors and rails spread the load. Homes and Gardens recommends molly bolts for larger paintings and mirrors, and a plaster rail for heavier art. |
Notice that the rails and molly bolts are for the big, serious pieces. Most canvas prints fall into the first three rows, which means a good plaster hook or an adhesive product handles the majority of jobs.
How to hang a canvas on plaster, step by step
This is the method that works for most canvases on a plaster wall. Give yourself twenty minutes and a level.
1. Plan the layout with tape
Don’t make holes until you know where the piece goes. Architectural Digest suggests using painter’s tape to map out a wall design before making holes. Cut a strip of tape (or a paper template) to the size of the canvas, stick it on the wall, and step back. Check it from the sofa, from the doorway, from where you stand when you cook. Move it until it feels right. If you are building a group of several pieces, our wall art arrangement guide by room covers spacing and eye-level rules in detail.
2. Mark the hook position
Turn the canvas over and measure from the top edge down to the hanging wire or sawtooth bracket. Hold the wire taut when you measure, since it stretches slightly under load. Transfer that measurement to the wall, measuring down from the top of your tape outline. Mark the point with a pencil.
If your canvas hangs from two hooks, use a level to keep them even, as Architectural Digest advises. Two hooks also share the weight and stop the piece from tilting.
3. Protect the spot
Place a small cross of painter’s tape over the mark. Family Handyman recommends tape at the spot as an extra precaution. The tape holds the surface of the plaster together so it is less likely to chip when the nail or bit goes in.
4. Make the hole gently
You have two sound choices:
- Pre-drill a pilot hole. Homes and Gardens recommends drilling small holes instead of hammering to prevent cracking. Use a small bit, and stay slow. The top-ranking guides for this topic agree that a masonry bit is the right tool for plaster, since plaster is hard and brittle.
- Tap, don’t hammer. If you use a plaster hook with its supplied nail, Family Handyman’s advice is to tap the nail gently rather than swing at it. Short, light taps, with your other hand steadying the hook.
Stop if you see the plaster start to flake or hear a hollow crunch. Move a couple of inches and try again, or switch to an adhesive solution.
5. Set the hook and hang the canvas
Push or tap the hook fully home so it sits flat against the wall. Hang the canvas, step back, and check the level. Adjust by sliding the wire on the hook or tilting the piece slightly. A small bumper (a self-adhesive felt or rubber dot) on each lower corner keeps the canvas from sliding and protects the paint underneath.
6. Peel off the tape
Remove the tape slowly and at a low angle to the wall.
When adhesive hooks are the better call
Plaster is unpredictable, especially in old houses with many coats of paint. If you rent, if the plaster crumbles at the slightest touch, or if you simply don’t want a hole, adhesive hooks and strips are a sensible route. A forum thread among the top results on this topic mentions that adhesive strips can pull paint away when removed carelessly. The advice there is to lever the frame off the wall rather than pulling straight out. The general principle is to follow the removal directions on the product, which usually involve pulling the tab slowly parallel to the wall.
A few habits make adhesive hooks more reliable:
- Clean the wall with a damp cloth and let it dry fully first.
- Press the strip firmly for the time the product instructions state.
- Wait before hanging the canvas, again as the packaging says.
- Stay under the rated weight, with room to spare.
If your landlord is strict or you just want to keep walls pristine, see our guide to hanging canvas art without damaging your walls.
Heavy canvases: studs, rails and molly bolts
Large canvases, especially oversized triptychs and statement pieces for a living room, need more than a single hook. Three proven options:
- Hang on a stud. Family Handyman notes that for heavy pictures, hanging on a wall stud gives the best stability and long-term support. A stud finder helps, and plaster can confuse cheap ones, so confirm with a small test hole in the hidden zone behind the canvas.
- Use a plaster rail. Homes and Gardens recommends a rail for heavier artwork. It spreads load along a track so you make fewer holes in fragile plaster.
- Use molly bolts. These expansion anchors grip from behind the wall, which Homes and Gardens describes as a secure hold that minimizes stress on the plaster. They need a pre-drilled hole of the size stated on the packaging.
If you’re unsure about a particularly large piece in a historic house, a local handyman or a picture-hanging professional can place the anchors in an afternoon.
Hanging a canvas on brick
Brick is the opposite problem. It will not crack from a nail, but it will not accept one either. Standard nails bend or bounce off, and a badly aimed drill can chip the face of the brick.
The no-drill option: brick clamps
Architectural Digest points to brick clamps or masonry anchors in place of standard nails on brick. Brick clamps hook onto the mortar joints, so there is nothing to drill. You position the clamp on the joint, tighten it, and hang the canvas from the hook. They suit lighter to mid-weight canvases and let you shift the piece later without leaving a mark.
If you do drill: aim for the mortar
If you want a permanent hook, drill into the mortar lines, not the brick. Art handler Edmond Caputo, quoted in Architectural Digest, says mortar is simpler to patch than the face of a brick, which makes it the safer choice for the look of the wall. The practical reasoning is easy to follow: a hole in a mortar joint can be filled and hidden, while a hole in a brick stays visible.
For tough spots where you must go into brick, Mr. Handyman of Princeton recommends a carbide-tipped masonry bit and a hammer drill for a controlled cut. Wear safety glasses, because brick dust is not something to breathe or get in your eyes. Use an anchor of the type sold for masonry, matched to the drill bit size on its packaging.

If your brick wall is also painted or textured, a rented hammer drill may be unnecessary: try clamps first.
Hanging a canvas on tile
Kitchen backsplashes, bathrooms and entryways are often tiled, and canvas art is a good way to soften them. The tile itself is the issue, because glazed tile is hard and glassy, and one wrong move can crack it.
Start with adhesive
The simplest answer, according to Architectural Digest, is a good-quality, low-profile adhesive hook rather than nails or screws. It avoids holes entirely. Look for hooks designed for smooth, non-porous surfaces, and wipe the tile clean of grease before applying. In a steamy bathroom or near a stove, check that the product is rated for moisture and heat.

If you’re decorating a kitchen, you might like the look of our kitchen wall art for a tiled space, where a bold canvas becomes the focal point against clean lines.
If you need to drill
Sometimes a canvas is too heavy for adhesive. The guidance from Mr. Handyman of Princeton is specific:
- For glazed tile, use a carbide spear-point bit or a diamond-core bit.
- Start at the slowest speed and keep the bit perpendicular to the tile.
- Use water to cool a diamond core.
- Reduce pressure as the bit breaks through, so the back of the tile doesn’t chip.
The same source advises drilling into grout lines where possible, since grout is easier to work than the tile face and spares the glaze. Place the hook position so that it falls on a grout intersection or joint, then check your canvas alignment using your tape layout.
In bathrooms and other moisture-prone areas, the same guide says to seal the hole with silicone so water can’t get behind the tile. That step is easy to skip and expensive to regret.
A note on the canvas itself
Hardware is half the equation. A canvas that arrives ready to hang saves you from fitting wire and brackets, which are common points of failure. A properly stretched canvas on a solid frame with a wire or sawtooth hanger already attached lets you spend your effort on the wall, not on the piece. If you are unsure about the technique for flat or gallery-style canvases, we have separate guides on how to hang canvas art and how to hang a flat canvas on the wall.
Our perspective
We make canvases for people who care how a room looks, and we have learned that the way a piece is hung matters almost as much as the art itself. A bold graffiti canvas or a high-fashion pop art piece is designed to be the first thing you see. A crooked hang, a visible crack in the plaster or a sagging wire undoes that effect immediately.
That is why we produce our canvases in the USA, on sturdy construction with archival inks, and ship them ready to hang. The point is that you can open the box, choose the right hook for your wall, and be done in minutes. A piece that arrives ready to hang means one less variable between you and a finished wall, and it lets you put your attention on the real challenge: your plaster, brick or tile.
Our advice to new homeowners and renters alike is to treat the layout as part of the purchase. Tape the size of the piece on the wall before you order, live with it for a day, and then pick the hardware by weight. Interior designers do the same, and the result is walls that look planned rather than improvised. If you are just moving in, our new home wall art ideas show how to start.
James
Ready to fill the wall?
Once your hardware is sorted, the fun part is choosing the art. Our collection spans more than 1,000 designs, including pop art canvas prints, graffiti and street art canvases and luxury wall art inspired by the world of high fashion. Every canvas is made in the USA with archival inks and arrives ready to hang.

Browse the full range on Luxury Art Canvas and find the piece that suits your wall, whether it’s plaster, brick or tile.
Common mistakes to avoid
- Swinging a hammer at old plaster. It is the single most common cause of cracks. Pre-drill or tap gently.
- Trusting one weak point for a heavy piece. Use two hooks, a rail, a stud or molly bolts.
- Buying hardware at the exact weight of the canvas. Go higher on the rating, as designers do.
- Skipping the layout. A tape template costs nothing and prevents extra holes.
- Drilling into brick faces. Mortar is easier to repair, so aim there if you must drill.
- Forgetting to seal tile holes in wet rooms. Silicone keeps water out of the wall.
- Ignoring the removal instructions on adhesive strips. Pulling straight out can take paint with it.
FAQ
Can I hang a canvas on plaster without drilling?
Yes. Reversible adhesive hooks suit light pieces, and Homes and Gardens suggests them for items ideally under 5 pounds. Family Handyman puts the limit for adhesive hooks or strips at pictures under 16 pounds, so always check the rating on the packaging. For anything heavier, use a plaster hook, rail or molly bolt.
What is the best nail for hanging a canvas on plaster?
A picture hook with a shock-absorbing nail head, used with gentle taps instead of hammer blows. Family Handyman recommends this for frames under 30 pounds, since it helps prevent the plaster from cracking. Pre-drilling a small pilot hole is another safe route.
Should I drill into brick or mortar when hanging art?
Mortar, in most cases. Art handler Edmond Caputo says it is simpler to patch than the face of a brick. If you want no holes at all, brick clamps hook onto the mortar joints without drilling.
How do I hang a canvas on a tile wall?
Start with a low-profile adhesive hook made for smooth surfaces, as Architectural Digest recommends. If you need a fixed hook, drill into a grout line with a carbide spear-point or diamond-core bit, at slow speed, and seal the hole with silicone in a bathroom.
Do I need a stud finder for plaster walls?
Only for heavy canvases. Family Handyman says a stud gives the best long-term support for heavy pictures. For light and medium canvases, the right hook or anchor is enough.
Custom Graffiti Canvas Design: How to Get It Right