
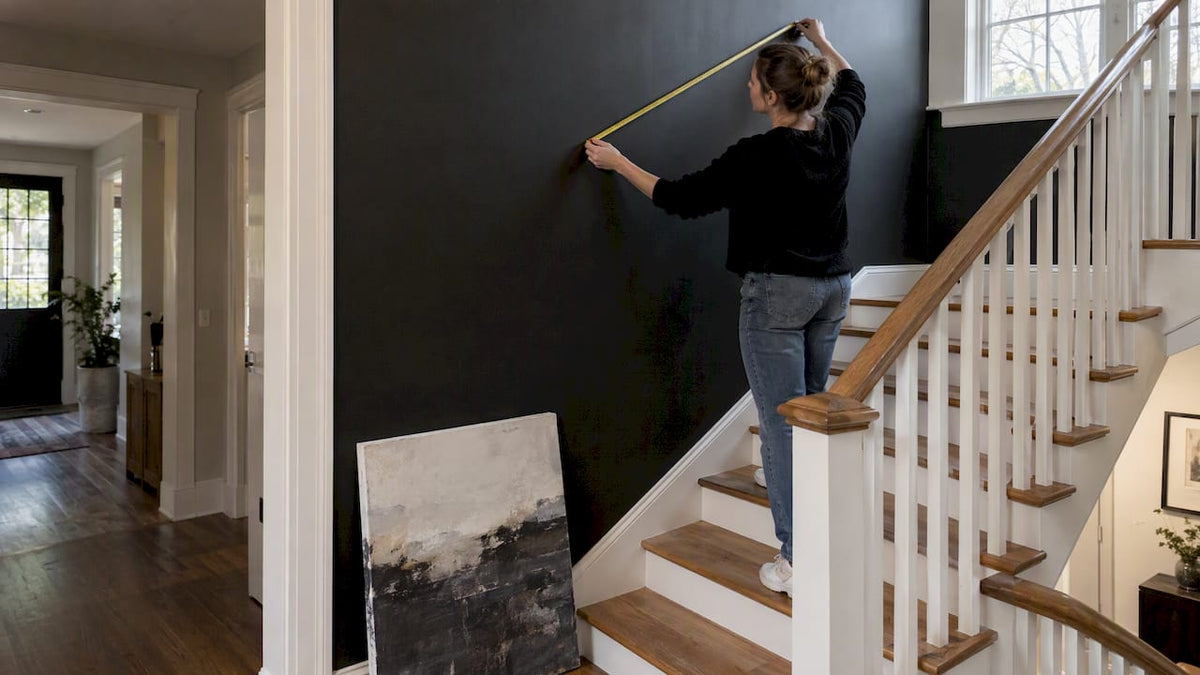
Follow frame centers that climb with the stair pitch rather than a flat horizontal line, using a 57-inch eye-level baseline that you adjust for the slope, and anchor the run with one focal piece at the landing. We work with ready-to-hang canvases, and this guide walks through the measuring steps, layout templates, spacing rules, and hanging sequence that make that approach work on any staircase.
Table of Contents
- Sizing thumb rules and quick reference numbers
- Measure and map your stair wall: pitch, centerline, and the data you need
- Proven layout approaches for stair gallery walls
- Sizing vs. proportion: picking frame sizes that read well from stair vantage points
- Hanging hardware and wall-type decisions
- Test, refine, and install: a practical, ordered installation sequence
- Luxury Art Canvas perspective on staircase layouts
- Tips for integrating staircase wall art with existing interior decor and color schemes
- Author’s quick perspective: tasteful rule-bending and small moves that make a big difference
- How Luxury Art Canvas helps you execute the plan
- FAQ
- Sources
Sizing thumb rules and quick reference numbers
The 57 inch center height is the baseline that Architectural Digest uses for eye-level hanging, and it works for stairs too, as long as you let it slide up or down along the pitch instead of staying flat. On a sloped run, that number becomes the midpoint of your diagonal, not a fixed rule for every frame.
A few sizes do most of the work on a typical staircase wall:
- 12x18 and 16x24 inches for supporting pieces along the ascent.
- 24x36 inches or larger for a single focal piece.
- Moderate spacing gaps between frames to keep the eye moving smoothly.
Design professionals consistently flag oversized gaps and flat, step-by-step spacing as the most common sizing mistakes on stairs. If your stairwell runs two or more stories and most viewing happens from the bottom landing looking up, lean toward the larger end of your size range. Small frames disappear from a distance, while a single oversized canvas holds its own.
Measure and map your stair wall: pitch, centerline, and the data you need
Before you cut a single template, gather real numbers from the wall itself.
- Measure total rise (floor to ceiling at the top) and total run (horizontal distance from bottom step to top step).
- Mark the step noses and any landings along the way, then record usable wall width at each point.
- Choose a mapping method: measure a center height at each step, or draw one straight pitch line from bottom to top and work from that line instead.
- Transfer your planned frame centers onto the wall using the pitch line, adjusting each by half the frame’s height plus the distance from the hook to the frame’s top edge.
Method two, the single pitch line, is easier to execute accurately because you are drawing one straight reference instead of correcting for a dozen individual step heights. Some European sizing guides use roughly 145 cm as an eye-level reference instead of 57 inches, but the mapping logic is the same either way: pick one baseline and let it travel with the slope.
| Tool | Purpose |
|---|---|
| Tape measure | Rise, run, and frame dimensions |
| Laser line level | Keeping the pitch line and centers straight |
| Painter’s tape | Mocking up positions before drilling |
| Paper templates | Full-size stand-ins for each frame |
A laser line level is close to non-negotiable here: Architectural Digest names it alongside a tape measure and painter’s tape as the baseline tool kit for hanging art accurately, and a stair wall punishes a crooked line more than a flat one does.
Proven layout approaches for stair gallery walls
Four layouts cover almost every staircase situation, and picking the wrong one is usually what makes a gallery wall feel off.
- Diagonal band: one row of centers tracking the pitch, best for long, straight runs with a simple railing.
- Anchored focal piece: a larger canvas at the landing with smaller supporting pieces climbing the stairs, which Better Homes & Gardens describes as a way to create a narrative that reads from multiple points on the stairs.
- Organic cluster: mixed sizes and frame styles for eclectic collections, held together by consistent spacing rather than a strict line.
- Grid or paired columns: two aligned columns for wider stair walls or a matched set of frames.
One piece per step tends to fail because stair treads rarely match frame widths, which forces either stretched spacing or cramped overlap.
Pro Tip: Lay out your full arrangement on the floor first, spaced exactly as planned, before you touch a pencil to the wall.

Sizing vs. proportion: picking frame sizes that read well from stair vantage points
A focal piece at the landing works best sized to roughly a third to half of the visible wall height there, large enough to anchor the eye without crowding the ceiling or the newel post.
- Pieces viewed mainly from a distance below, like in a tall entry foyer, read better slightly larger than the same spot would need at close range.
- Pair one dominant size with two or three smaller, related sizes rather than scattering five different dimensions.
- Keep frame finishes and mat colors limited to two, at most three, so the grouping reads as one composition instead of a scattered collection.
- A wall with varied art styles still needs size discipline. Consistent sizing is often what holds a mixed-style gallery together.
Our guide to layering statement canvases covers pairing a dominant piece with supporting work in more depth if your collection leans toward large-format pieces.
Hanging hardware and wall-type decisions
Weight and wall type decide your hardware, not the size of the frame alone.
- Drywall with studs: standard picture hooks or screws rated for the frame’s weight.
- Drywall without a stud: toggle bolts for anything over a few pounds.
- Masonry or brick: masonry anchors rated for the wall material.
- Oversized canvases: French cleats or picture rail systems that distribute weight across a wider mounting area.
A single D-ring and nail is rarely enough for anything over roughly 15 to 20 pounds, so check your frame’s actual hanging hardware before assuming a basic hook will hold. Our canvas hanging guide walks through D-ring and cleat setups for our own ready-to-hang pieces. When a stairwell wall is masonry, oddly shaped, or you are hanging anything heavy above a stairwell where a fall risks real injury, it is worth hiring a professional installer rather than guessing.
Test, refine, and install: a practical, ordered installation sequence
Mocking up the layout before drilling is the step Better Homes & Gardens and Frameology both point to as the difference between a gallery wall that looks planned and one that looks accidental.
- Cut paper templates or use painter’s tape to outline every frame at its planned position.
- Walk the stairs from bottom, mid-flight, and the top landing, checking sightlines at each point.
- Adjust spacing or shift the centerline slightly based on what you actually see, not just the measurements.
- Mark final centers, transfer hook offsets, confirm level with a laser, install anchors, then hang and recheck.
Pro Tip: Recheck level from the bottom of the stairs after everything is hung. A line that looks straight up close can read crooked from a distance.
Leave clear space above the handrail line so nothing hangs low enough to interfere with hands reaching for support.
Luxury Art Canvas perspective on staircase layouts
We build our canvases ready-to-hang, with D-rings or cleats already fitted and sizes curated to the pairs and trios that work on stair walls, so the measuring work above translates directly into a finished look without extra framing decisions. Our general approach: pick one focal canvas sized for the landing, then choose two or three supporting pieces in a related palette. Our guide to decorating a staircase wall and our canvas hanging guide go deeper into both steps.
Tips for integrating staircase wall art with existing interior decor and color schemes
A staircase wall rarely sits in isolation. It usually connects a living room, an entryway, and an upstairs hallway, which means the art on it has to make sense from more than one room at once.
Start with the color already in the space. Pull one or two tones from your existing rugs, trim, or furniture and let the art reference them rather than introduce a competing palette. A graffiti piece heavy in red and black will clash with a soft, neutral living room unless something else in the house already carries that contrast.
Pay attention to door and trim widths near the base of the stairs, since they set the visual rhythm the art needs to match. A guide on interior door trends is a useful reference if you are also updating trim or doors nearby, since wider or narrower door casings change how much breathing room your bottom-of-stairs frame actually has.
Frame finish matters as much as the art itself. A stairwell with black iron railings reads cleaner with black or dark wood frames, while a lighter, farmhouse-style stair often calls for white or natural wood. If your home leans toward a specific art movement already, pop art in a living room or minimalist prints in a modern hallway, extend that same style up the stairs instead of starting a new theme partway through the house. Consistency between floors is usually what makes a staircase gallery wall feel like part of the home rather than an afterthought.

Author’s quick perspective: tasteful rule-bending and small moves that make a big difference
The 57 inch rule is a starting point, not a law. Bend it for a skylight, an oddly placed window, or a landing that deserves a bigger moment.
My favorite small moves: keep frames the same width even when heights vary, favor odd numbers of supporting pieces, and always anchor the landing. Prototype on the floor, then iterate.
— James
How Luxury Art Canvas helps you execute the plan
Once you know your sizes and spacing, the remaining work is sourcing art that fits those numbers without custom framing delays. Our canvases arrive ready-to-hang, pre-stretched with hanging hardware already attached, in sizes that match the proportions this guide recommends.

A few starting points:
- Pop Art Canvas Prints for bold supporting pieces in common stair-friendly sizes.
- Graffiti Wall Art & Street Art Canvas for large-format focal pieces suited to a landing.
- Minimalist Prints for a quieter palette that pairs easily with existing decor.
Browse our full catalog at Luxury Art Canvas to find sizes that match the measurements you just took.
FAQ
How to hang three pictures on stairs?
Pick one dominant size and two matching or related supporting sizes, then space them 2 to 4 inches apart with centers following the stair pitch rather than a flat line. Mock the arrangement with paper templates first and check it from the bottom, middle, and top of the stairs before hanging.
What is the minimum length of stairs in feet?
Minimum stair dimensions are governed by local building codes rather than a single universal figure, so check your area’s building code or a licensed contractor for the exact requirement that applies to your home. For gallery wall planning purposes, measure your actual stair run and work with that number instead of a code minimum.
What is the ideal size for wall art?
There is no single ideal size. Architectural Digest recommends centering art around 57 inches from the floor as a baseline, and on stair walls that baseline should shift with the slope rather than stay fixed. A focal piece at a landing generally reads best sized to about a third to half of the visible wall height there.
What is the 17/18 rule for stairs?
The 17/18 rule is a stair-building formula related to the sum of a riser plus a tread for comfortable step proportions, and it governs stair construction, not art sizing. It is worth knowing if you are planning new stairs, but it does not determine where you hang art on an existing staircase.
What is the best way to measure a staircase wall for art?
Measure the total rise and run, mark each step nose and any landing, then draw a single pitch line from the bottom of the run to the top instead of measuring a new center height at every step. Better Homes & Gardens recommends testing the layout with painter’s tape or paper templates before committing to final placement.
Made in USA Canvas For U.S. Buyers: Verify Origin, Avoid 2–5yr Fading