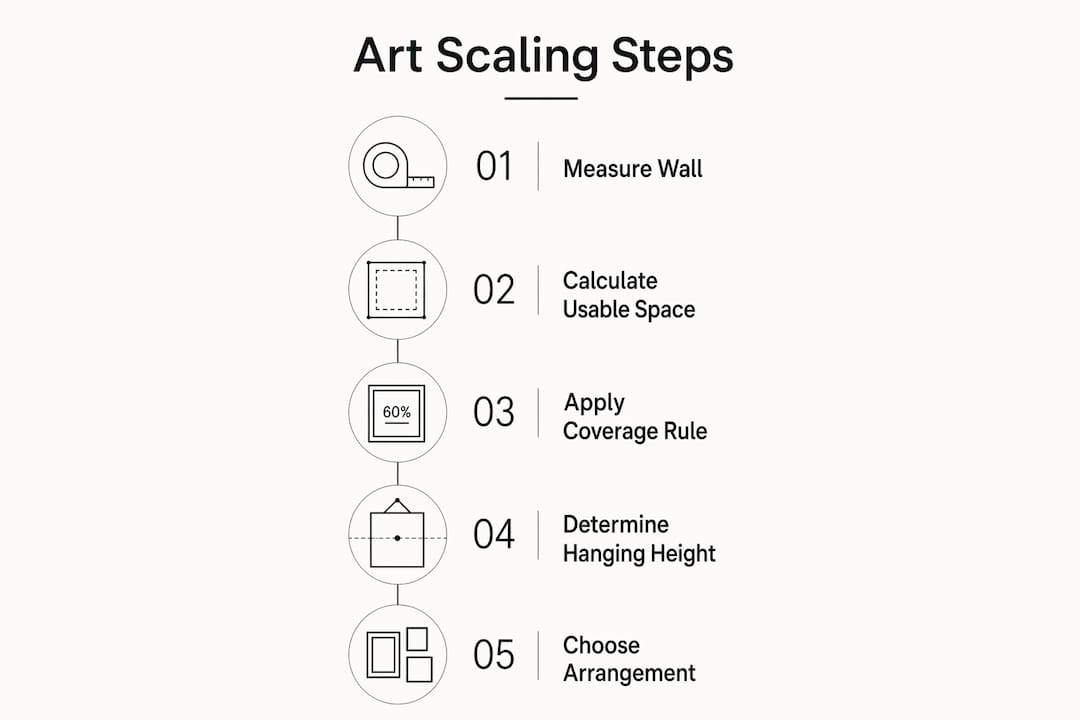
Scaling wall art for large spaces means selecting artwork sized, positioned, and arranged to fill expansive walls without overwhelming or disappearing into them. The industry term for this practice is proportional art scaling, and it combines interior design math with visual judgment. Most homeowners get it wrong in the same two ways: they buy art that is too small for the wall, or they hang it too high. This guide gives you the exact rules, measurements, and creative strategies to get it right the first time, whether you are working with a soaring entryway, an open-plan living room, or a loft with 12-foot ceilings.
What are the optimal size and scale rules for wall art in large rooms?
The foundational rule for proportional art scaling is the two-thirds rule. Wall art should cover 60% to 75% of the width of the furniture it hangs above, or the open wall width if no furniture anchors the space. This means a 90-inch sofa calls for artwork between 54 and 68 inches wide. Going narrower makes the piece look lost; going wider throws the entire arrangement off balance.
Ceiling height changes the equation for vertical scale. Rooms with ceilings above 9 feet can support taller, more vertical compositions without making the space feel compressed. A horizontal canvas that works perfectly in a standard 8-foot room can look squat and underpowered in a 12-foot loft. For high-ceiling rooms, consider vertical canvases, stacked arrangements, or oversized square formats that draw the eye upward and acknowledge the full height of the room.
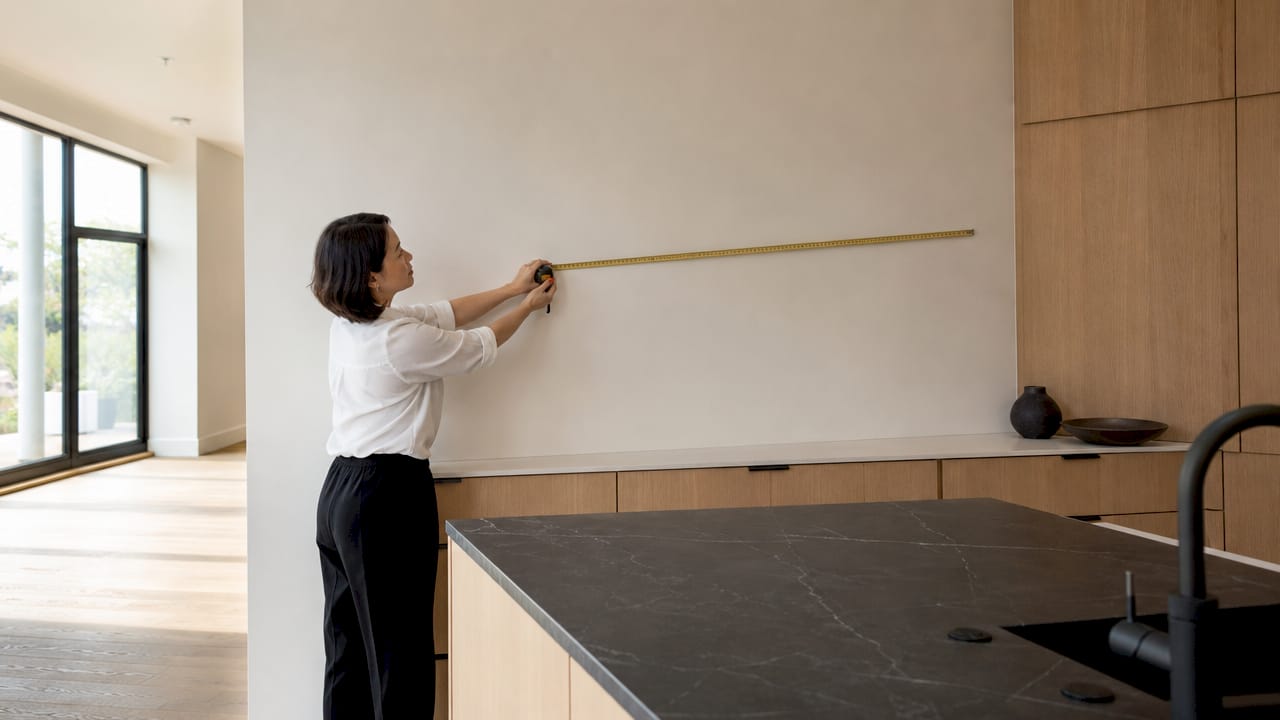
Before you apply any percentage rule, calculate your usable wall space. Subtracting architectural obstructions like windows, doors, and built-ins from the total wall width gives you the real number to work from. A wall that measures 14 feet wide but contains a 36-inch window and a 30-inch door frame has roughly 9 feet of usable space. Apply the 60 to 75% rule to that number, not the total.
| Furniture or wall width | Recommended art width (60–75%) | Example canvas size |
|---|---|---|
| 60-inch loveseat | 36–45 inches | 40 x 30 inches |
| 84-inch sofa | 50–63 inches | 60 x 40 inches |
| 120-inch open wall | 72–90 inches | 80 x 60 inches |
| 144-inch feature wall | 86–108 inches | 96 x 72 inches |
Pro Tip: Tape the exact dimensions of your intended artwork onto the wall using painter’s tape before you buy anything. Live with the taped outline for a day and view it from every seating angle in the room. This single step eliminates most sizing regrets.
How to hang large or oversized wall art for visual balance
Hanging height determines whether art feels grounded in a room or floating above it. The gallery standard places the center of any artwork at 57 inches from the floor, which aligns with average human eye level. For oversized frames taller than 60 inches, raising the center point to 60 to 65 inches better maintains visual balance without pushing the piece into ceiling territory.
When art hangs above furniture, a specific gap rule applies. The bottom edge of wall art should sit 6 to 8 inches above sofas, credenzas, or console tables. This gap is tight enough to visually connect the art to the furniture below it, but wide enough to avoid looking cramped. Art placed 18 or more inches above a sofa appears to float, disconnected from the room’s furniture arrangement.
For rooms with very tall ceilings, resist the temptation to push art higher just to fill vertical space. Visual comfort in hanging height comes from human scale, not architectural scale. Art should stay connected to the viewer and the furniture, not drift upward to split the difference between floor and ceiling.
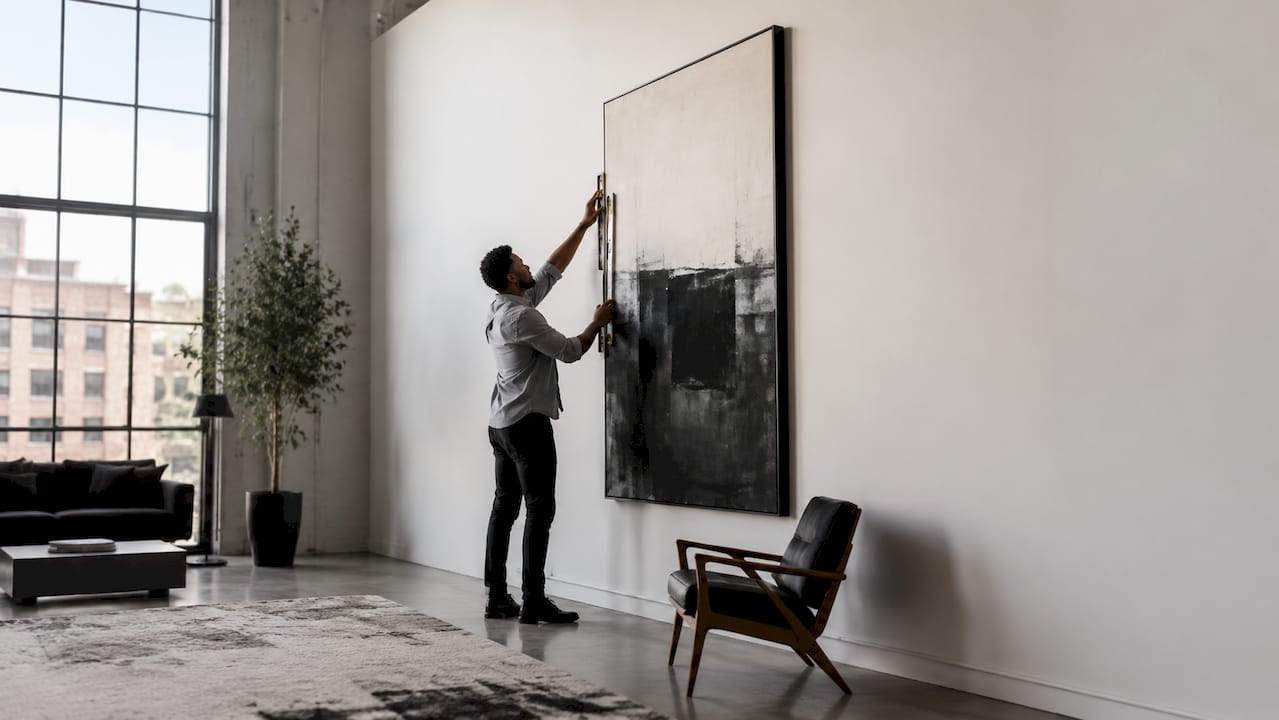
Here is a step-by-step method for precise installation of large canvas art:
- Decide your target center height on the wall (57 inches for standard, 60 to 65 inches for oversized pieces).
- Measure the total height of the canvas frame and divide by two to find the midpoint.
- Measure the distance from the top edge of the frame down to the hanging wire when pulled taut.
- Subtract the wire distance from your target center height. The result is where your nail or anchor goes.
- Mark the nail point with a pencil, double-check with a level, and install your hardware.
- Hang the piece, then step back at least 10 feet to assess the height visually before committing.
Pro Tip: For very large canvases, use two anchor points spaced evenly across the back of the frame rather than a single central nail. This prevents tilting over time and distributes weight more safely on drywall.
You can find detailed installation guidance in this canvas hanging guide from Luxuryartcanvas, which covers wall types and hardware options for heavy pieces.
Creative solutions for scaling wall art beyond single large pieces
A single oversized canvas is not the only way to fill a large wall. Gallery walls, multi-panel arrangements, and dimensional art each offer distinct advantages for decorating large walls with personality and depth.
Gallery walls work best when you treat the entire grouping as one visual unit. Center the full arrangement at eye level and maintain consistent spacing of 2 to 3 inches between frames. The combined footprint of the gallery should still follow the 60 to 75% width rule relative to the furniture or wall below it. Inconsistent gaps or a grouping that drifts too far to one side breaks the visual cohesion that makes gallery walls effective.
Diptychs and triptychs offer a middle ground between a single statement piece and a full gallery wall. A triptych of three 24 x 36-inch panels, for example, creates a combined width of 72 inches, which is appropriate above an 84 to 96-inch sofa. These arrangements work especially well with bold graffiti or pop art imagery because the panel breaks add rhythm to the composition without fragmenting the subject.
Dimensional and textured art adds a layer of visual interest that flat prints cannot replicate. Sculptural canvas work, mixed-media pieces, and high-relief printing catch light differently throughout the day, making a large wall feel dynamic rather than static. For spacious rooms where a flat canvas might look thin against the architecture, dimensional art for high ceilings and open walls creates the visual weight the space demands.
- Gallery walls: Treat as one unit. Use 2 to 3-inch gaps between frames. Center the full grouping at 57 inches.
- Diptychs and triptychs: Calculate combined panel width to meet the 60 to 75% rule. Keep panel spacing consistent at 1 to 2 inches.
- Dimensional art: Ideal for rooms where flat art lacks visual weight. Works well on feature walls with strong directional lighting.
- Thematic sets: Group pieces by color palette, subject, or style rather than matching frames for a collected, curated look.
For more ideas on oversized canvas placement, Luxuryartcanvas has a practical guide on building focal walls with large-format pieces.
Common mistakes in scaling and hanging large wall art
The most frequent error in large space wall decor is choosing art that covers less than half the furniture width below it. Art narrower than the furniture it anchors looks dwarfed and makes the furniture appear larger and heavier by contrast. A 48-inch canvas above a 90-inch sectional is the decorating equivalent of a postage stamp on a billboard.
Hanging art too high is the second most common mistake, and it is just as damaging to a room’s visual harmony. When the bottom edge of a canvas sits more than 10 inches above a sofa, the art loses its connection to the furniture and the room reads as two separate zones stacked on top of each other. The two-stage scale test confirms both proportional width coverage and vertical visual balance by physically stepping back to check that the piece anchors to human sightlines.
For rooms with high ceilings, another mistake is ignoring the space above the art. Oversized art in high-ceiling rooms needs at least 12 inches of blank wall above the piece to avoid visually compressing the ceiling. Pushing a tall canvas too close to the ceiling line makes the room feel shorter, not taller.
- Art too small: Anything covering less than 60% of the furniture width below it will look undersized. Measure before you buy.
- Art too high: Bottom edge more than 8 to 10 inches above furniture breaks visual anchoring.
- Ignoring usable wall space: Always subtract doors, windows, and built-ins before calculating proportional width.
- Skipping the visual check: Math alone is not enough. Step back 10 to 15 feet and photograph the wall to catch scale issues before nailing.
Pro Tip: Take a photo of your wall with the painter’s tape outline in place, then view it on your phone screen. Screens compress perspective in a way that mimics how guests see your room from across a space, making scale problems immediately obvious.
Key takeaways
Scaling wall art for large spaces requires applying the 60 to 75% width rule to usable wall space, hanging art at human eye level, and treating multi-piece arrangements as single visual units.
| Point | Details |
|---|---|
| Apply the two-thirds rule | Art should cover 60 to 75% of furniture width or usable wall width for balanced proportion. |
| Use usable wall space | Subtract doors, windows, and built-ins before calculating art dimensions. |
| Hang at human eye level | Center art at 57 inches; raise to 60 to 65 inches for frames taller than 60 inches. |
| Anchor art to furniture | Keep the bottom edge 6 to 8 inches above sofas or credenzas to avoid a floating look. |
| Test before you hang | Use painter’s tape outlines and distance photos to validate scale before installation. |
What I have learned from years of watching large walls go wrong
Most people approach a large wall the same way they approach a small one. They find a piece they love, hold it up, and decide it looks fine. It almost never does. Large walls have a way of shrinking art that looks substantial in a gallery or on a product page.
The shift that changes everything is planning from the wall outward rather than from the artwork inward. Measure your usable wall space first. Calculate the size range you actually need. Then shop within that range. This sounds obvious, but the majority of large-wall decorating mistakes happen because someone found the art before they found the dimensions.
I have also found that the two-stage scaling test is more reliable than any formula. Confirm the proportional width coverage on paper, then physically step back and look. If the piece feels right from 12 feet away, it is right. If something feels off, it usually is, regardless of what the math says. Large walls require art that integrates with furniture and sightlines, not just art that fits dimensionally.
My other strong opinion: do not default to safe, neutral art just because the wall is large. Big spaces can handle bold choices. A large graffiti canvas or an oversized pop art piece in a high-ceiling room creates the kind of visual anchor that makes a space feel intentional rather than furnished. The scale of the room gives you permission to be more decisive with your art choices, not less.
— James
Make your large walls impossible to ignore

If you have measured your wall, calculated your size range, and are ready to find art that actually fills the space with impact, Luxuryartcanvas has over 1,000 designs built for exactly this purpose. The collection includes large graffiti canvases sized for feature walls and high-ceiling rooms, as well as bold pop art pieces that apply the proportional principles in this guide from the moment you hang them. Every canvas is crafted in the USA with materials built for long-term visual impact. Browse the full graffiti canvas collection to find a statement piece that matches your space and your style.
FAQ
What size art works best for a large living room wall?
Art for large living rooms should cover 60 to 75% of the width of the sofa or wall it anchors. For an 84-inch sofa, that means artwork between 50 and 63 inches wide.
How high should you hang art in a room with high ceilings?
Center the artwork at 57 inches from the floor regardless of ceiling height. For oversized frames taller than 60 inches, raising the center to 60 to 65 inches maintains better visual balance without pushing the piece out of human sightline range.
Can a gallery wall replace a single large canvas in a big room?
Yes, provided the full gallery grouping covers 60 to 75% of the wall or furniture width and is centered at eye level with consistent 2 to 3-inch gaps between frames. The grouping functions as one visual unit.
How do you scale wall art for rooms with very high ceilings?
Use vertical or large-format canvases that draw the eye upward, and leave at least 12 inches of blank wall above the piece to preserve ceiling height perception. Art should stay anchored to furniture and human sightlines, not float toward the ceiling.
What is the biggest mistake people make when decorating large walls?
Choosing art that covers less than half the furniture width below it. Art narrower than 60% of the furniture it anchors looks undersized and makes the furniture appear heavier by contrast.
What Does Designer Canvas Art Mean for Your Space
Why Large Format Art Anchors a Room: 2026 Guide