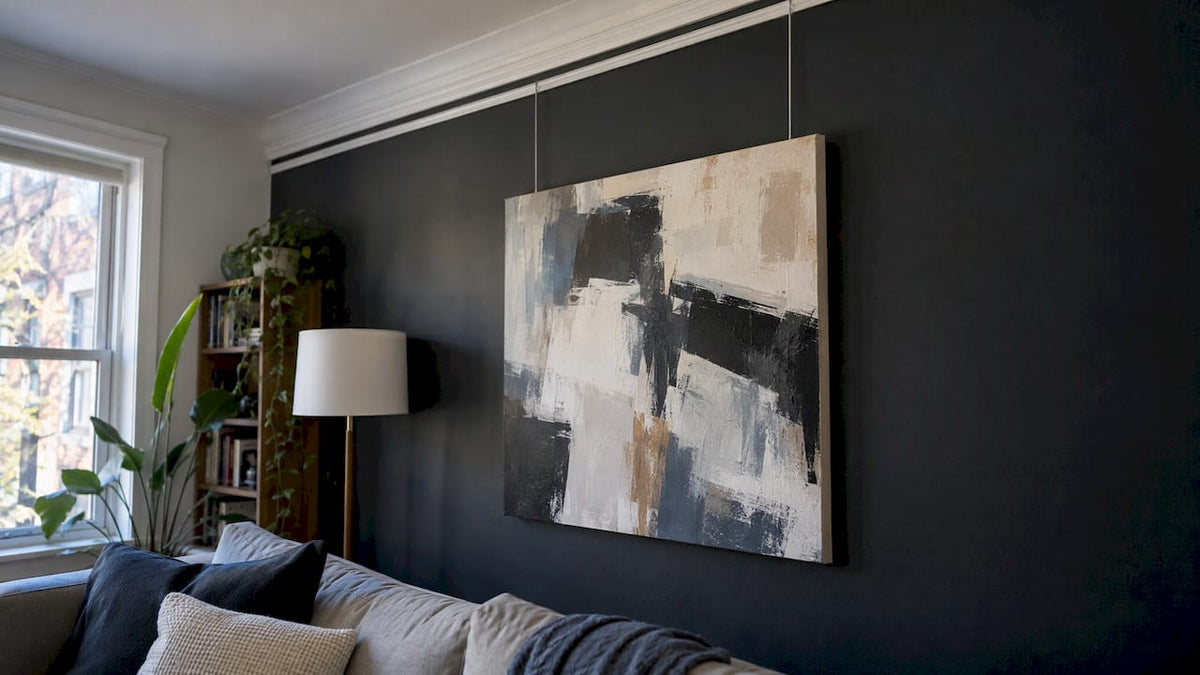
Yes, you can hang a canvas from a picture rail, and it is one of the cleanest ways to display art: no holes in the wall, and you can slide the piece sideways or swap it in minutes. The canvas needs two attachment points on the back, a hook that sits over the rail, and cord or cable rated for more than the canvas weighs. Get those four things right and the rest is leveling.
This guide walks through the hardware, the weight limits, the exact steps and the mistakes that make a canvas tilt or sag. It is written for homeowners, renters, designers and office managers who want a gallery look without patching drywall later.
Table of Contents
- Why a picture rail works so well for canvas
- The hardware chain: four parts, one weak link
- Preparing the back of the canvas
- Step by step: hang the canvas
- Arranging more than one canvas
- Perspective
- Choosing canvases that suit a rail display
- Our canvases for your rail
- FAQ
Why a picture rail works so well for canvas
A picture rail is a strip of molding that runs along the wall, usually near the ceiling. Its channel or top lip holds a hook, and the artwork hangs from the hook on a cord or cable. Hunker explains that the rail channel takes a hook or gallery rod, with the cord, wire or cable suspending the piece.
The system was a staple in American homes from the late 19th century to the mid-20th century. Picture Hang Solutions notes that the hooks could slide along the rail, so artwork could change without damaging walls. That is exactly why it suits a canvas collector who rotates pieces, a renter who cannot drill, or an office that restyles its walls each season.
There is a trade-off in looks: cords stay visible. In a modern room, that can be a feature. Thin steel cable or a clear cord looks deliberate, and a bold canvas draws the eye well before the hanging line does.
What if your home has no rail?
You can fit one. A rail system is a rail, hooks and cords or rods, and wooden or aluminum rails mount with screws into studs or solid backing. The load ratings in the next section tell you what to buy. If you would rather skip a rail, our guide to hanging canvas art without damaging your walls covers other low-impact options.
The hardware chain: four parts, one weak link
A rail display is a chain: rail, hook, cord or cable, and the fixings on the canvas. Artiteq describes a system as rail, hanging wire and hanging hook, and says the artwork’s weight decides which hook and wire to combine with the rail’s maximum capacity per meter. Hunker adds that each element has its own rating, and the safe load is set by the lowest one.
Rails and what they carry
Rail ratings vary a lot by product. The figures below come from rail makers’ US pages and are published ratings for those specific products.
| Component | Published rating | Source |
|---|---|---|
| Smartspring on perlon cord | up to 4 kg (8.8 lb) | STAS FAQ |
| Zipper on perlon cord | up to 15 kg | STAS FAQ |
| Zipper on steel cable | up to 20 kg (44 lb) | STAS FAQ |
| Wooden rail, screwed or nailed | 40 lb per yard (20 kg per meter) | STAS windsor rail |
| Minirail | 50 lb per yard (25 kg per meter) | STAS homepage |
| Heavy-duty gallery rail (j-rail max) | up to 100 kg per linear meter | STAS product sheet |
Notice that the wooden rail’s 40 lb per yard figure applies when it is screwed or nailed in. The same product page says capacity drops when it is glued. If your home has an original rail, you often do not know its rating, so treat it conservatively and use lighter canvases or spread the load across two hooks.
Hooks and cords
A picture rail hook has a larger curved end that sits over the rail lip. Slide it on so the weight pulls down and into the rail, not outward. Gallery-style systems use brass rods. The Washington County Arts Center’s hanging specifications describe its French J-rod setup: curved solid brass rods on a rail, with a sliding hook rated to hold up to 50 lb.
For most home canvases, a pair of hooks and either a cord or steel cable is enough. Choose cable for larger, heavier pieces and cord for light ones. If you are comparing hanging methods more generally, our note on sawtooth hanger versus wire explains why wire suits pieces that need adjustment.

Why you should keep a safety margin
Manufacturer ratings often include a built-in buffer. A Designs Ink guide says hanging components carry a manufacturer rating of 3x the frame weight, so a part rated for 100 lb will most likely hold 300 lb. Do not treat that as extra capacity to use. Plan around the printed rating, and leave room. Artiteq also advises that on less solid walls you should not use a system’s full maximum load.
Preparing the back of the canvas
A canvas is a print on fabric stretched over a wooden frame called stretcher bars. Rail hanging needs fixing points that can take cord, so the back matters more here than on a standard nail-and-wire hang.
- Choose screw eyes or D-rings. Hunker says screw eyes suit canvases best, twisted into the inner sides of the stretcher bars so the loops do not stick out from the wall. D-rings on the bars work too.
- Place them a third of the way down. Both Hunker and the Washington County Arts Center place fixings roughly one third of the way down from the top, one on each side.
- Use short screws. The screw must bite into the wooden bar and never push through toward the printed face. Measure the bar depth before you start.
- Keep the pair level with each other. Measure from the top edge on both sides. A 1/4-inch difference shows up as a visible tilt once it hangs.
If the back of your canvas already has attachment points in the right place, you can use them. Check that they sit at about a third of the way down and are firmly fixed. For the broader basics of preparing a piece, see our guide on hanging canvas art without a frame.
Why the third-down position matters
Where the cord attaches changes how the canvas sits. We explains that attachment closer to the top holds the piece flatter to the wall, which suits eye-level display, while attachment nearer the middle tilts it forward, which suits a piece hung above eye level. For most living rooms and offices, you want it flat, so keep the fixings in the upper third.
Step by step: hang the canvas
This is the full routine, with the point where each step goes wrong.
Step 1: Mount the hooks on the rail
Slide two picture rail hooks over the rail lip, spaced to match your canvas. For a wide piece, place them roughly in line with the screw eyes, so the cords run nearly vertical. Hunker says two hooks, one on each side, spread weight evenly and stop heavier pieces from wobbling.
Where it goes wrong: a single hook in the center. It lets the canvas pivot and drift out of level. AS Hanging says anything wide or heavy should hang from two cables or rods for exactly this reason.

Step 2: Cut and attach the cord or cable
Measure from the fixing on the canvas, up to the hook, with the canvas at your target height. Add spare length for knots. Thread the cord through each ring, tie double knots and pull hard to test them. With steel cable and adjustable hooks, you can fine-tune the height at the hook instead of cutting.
Where it goes wrong: knots that slip. A slow slide of cord through a single knot is how canvases drop a quarter inch a week. Double knots, pulled hard, prevent it.
Step 3: Hang and set the height
Lift the canvas, hook the cords over the rail hooks, and let it settle. Hunker says adjustable hooks let you set the picture at the viewing height you want, for example 5 feet above the floor. Standard gallery practice puts the center of the artwork at eye level, 57 to 60 inches from the floor, a rule AS Hanging also gives for the central piece in a gallery wall. Our canvas hanging height guide shows how to work that out for your own ceiling and furniture.
Where it goes wrong: rails sit high. A rail 12 to 18 inches below a standard ceiling puts the hook high up, so a long cord runs down to an eye-level piece. That is normal. The cord length is what you adjust, not the rail position.
Step 4: Level and check
Place a level on top of the canvas and adjust one cord until the bubble centers. Then step back and look at the gaps against the ceiling line and nearby furniture. If the piece leans out at the top, your fixings are probably too low on the back: move them closer to the top third.
Step 5: Check the load once
Add up the canvas weight, then compare it with the lowest rating in your chain: rail, hook, cord and fixings. Designs Ink warns that even where two wires could each hold 100 lb, an unbalanced load could put the full weight on one wire, so you should never exceed the maximum for a single wire. Use two, keep them the same length, and the load shares.
Arranging more than one canvas
A picture rail is ideal for a layered look because pieces can slide. A few rules help:
- Anchor first. Hang the central or largest canvas first, then set neighbors relative to it. AS Hanging suggests anchoring at eye level, then aligning the rest to that piece.
- Vary the cord lengths on purpose. Two or three canvases at different drops create a staggered, gallery effect. Do it with intent, with clear differences, not near misses.
- Keep spacing even. Two to three inches between pieces reads as a set. For a room-by-room approach, our wall art arrangement guide covers layouts.
Perspective
Most people think of canvas as a nail-and-wire job. We see a picture rail as the better match for bold, large-format pieces. The cords turn into a clean vertical line, the wall stays untouched, and rehanging takes a minute when you want to rotate in a new design.
That flexibility is the reason our catalog is built around ready-to-hang canvas wall art made in the USA with archival inks and quality materials. With over 1,000 designs across graffiti, pop art, black and white, and high-fashion subjects, a rail lets you try a new piece in a spot without committing to a drill hole. Pick the artwork for the statement it makes, then let the rail do the rest.
James
Choosing canvases that suit a rail display
Rail hanging shows off the whole piece and its edge, so choose designs that read well from across a room. High contrast and strong shapes hold up when cords run beside them. Our graffiti and street art canvases and pop art canvas prints are built on exactly this: bold color and heavy lines that command a wall. For a quieter, more refined room, the luxury wall art collection brings high-fashion imagery in a polished format.
A few practical pairings:
- Home office or studio: one large canvas on two cables, centered over a desk or sofa.
- Hallway or older home with an original rail: a row of smaller canvases on cords of staggered length.
- Renter’s apartment: a rail fitted into studs, or a rail already in place, so the walls stay as you found them.
- Reception or lobby: a matching pair on identical drops, with a level check at install.
Our canvases for your rail
If you are planning a rail wall, start with the art. Luxury Art Canvas offers museum-quality, ready-to-hang canvas wall art in more than 1,000 designs, made in the USA with archival inks. Explore the full catalog or go straight to a style: HypeBeast art, Chanel wall art or Louis Vuitton wall art.

For wall-specific questions once your rail is up, our guides on hanging canvas on a wall and on plaster, brick or tile walls cover the surface you are working with.
FAQ
Can I hang paintings or canvases from a picture rail?
Yes. A picture rail holds a hook, and a cord, wire or cable carries the artwork from it. The canvas needs screw eyes or D-rings on the back and a hook rated above its weight. Two hooks are better than one on wide pieces.
How do I hang a canvas with wire from a picture rail?
Fix a ring on each side of the back, about a third down from the top. Thread wire or cord through both rings and knot it, then run it up and over the hook on the rail. Pull the knots hard, hang the piece and check it with a level.
How much weight can a picture rail hold?
It depends on the rail and hardware. Published ratings range from about 40 lb per yard for a screwed wooden rail to 100 kg per meter for a heavy-duty gallery rail. The safe load is set by the lowest-rated part in your chain, so check the rail, hook and cord ratings together.
Can I use a canvas with no wire or hanging hardware?
Yes, by adding fixings yourself. The Washington County Arts Center prefers D or V hooks with about a 1-inch opening, one on each side about a third of the way down from the top, with no wire needed. Use short screws into the stretcher bars.
Why does my canvas tilt forward on a rail?
The cord is probably attached too low on the back. Attachment near the middle tips the top forward, while attachment closer to the top keeps it flatter to the wall. Move the fixings up and level the piece again.
Conference Room Art Size: How Big Should the Artwork Be?
Designer Brand Art Decor: How to Style Luxury Wall Art