
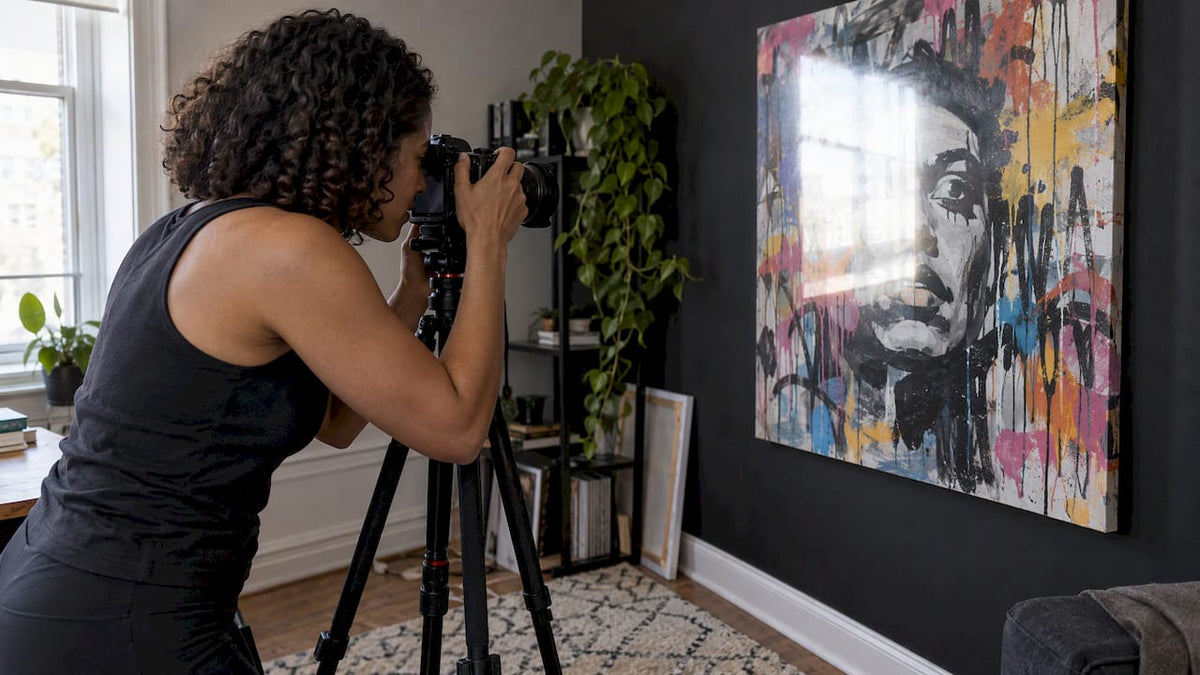
Glare on a canvas almost always comes from one thing: a light source sitting at the wrong angle to the surface. Move the light, soften it, or control the daylight, and the reflection goes away. The same logic applies when you photograph a canvas: put the lights far to the sides, keep the camera square to the work, and turn off everything overhead.
Below you will find fixes for a canvas on your wall and a step-by-step setup for photographing one. We also cover how to light art safely, because the best anti-glare setup is useless if it fades the piece.
TL;DR
- Glare comes from light bouncing off the surface toward your eyes or lens. Change the angle of the light, not the artwork.
- On the wall, aim ceiling or track lights so the beam reaches the center of the canvas at about 30 degrees, and avoid 45 degrees.
- Keep direct sun off the canvas. Use blinds, curtains or window film, and choose LED bulbs.
- To photograph a canvas, use two matching lights at 45 degrees on either side, no flash, and a camera parallel to the work.
- Editing apps are for exposure and color tweaks, so get the reflection out before you shoot.
Table of Contents
- Why a canvas gets glare in the first place
- Find the glare before you fix it
- Fix 1: Re-aim the light on your wall
- Fix 2: Tame the window
- Fix 3: Choose the right bulbs and accessories
- Our perspective
- Photographing a canvas without glare
- A quick fix table
- Pick a spot and a piece that works with your light
- Ready-to-hang canvas for a well-lit room
- FAQ
- Sources
Why a canvas gets glare in the first place
Glare is a mirror effect. When a bright light hits a surface and bounces straight into your eye, you see the light instead of the image. The higher the sheen of the surface, and the more directly the light arrives, the stronger it is.
A canvas has one advantage over a framed print: there is no glass or acrylic layer in front of it. Glazing is a common culprit for reflections, and guidance on framed work points to anti-reflective or non-glare glazing as one remedy. A canvas hung without glass skips that problem. What is left is the light itself, and that is something you control.
There are three usual sources:
- Recessed or ceiling fixtures at the wrong angle. Architectural Digest notes that ceiling lights aimed at about 45 degrees can produce reflective glare.
- Windows. Direct sun hitting the surface creates hotspots and harsh shadows, according to the New Mexico State Committee of the National Museum of Women in the Arts.
- Mixed or stray light. Lamps, lit screens and bright objects across the room all reflect in a surface, and any of them can show up as a bright patch.
Find the glare before you fix it
Stand where you normally look at the piece: on the sofa, at the desk, in the doorway. Then walk slowly left and right. The bright patch will move as you move, and it tells you which light is responsible.
A quick check:
- Switch off one light at a time. The patch that disappears points to the culprit.
- Close the blinds. If the patch fades, it is daylight.
- Look for reflective items facing the canvas, such as a mirror, a glass frame or a bright screen. Photographers photographing artwork are advised to remove or cover these because they can appear in the reflection, as one anti-glare guide for photo canvases suggests. Treat that as a general tip: it is easy to test in your own room.
Once you know the source, pick the matching fix below.
Fix 1: Re-aim the light on your wall
The angle matters more than the brightness. Architectural Digest, quoting lighting specialists, says ceiling-mounted lights should generally be aimed so the beam reaches the center of the artwork at about 30 degrees, and that angles around 45 degrees can cause reflective glare.
Practical adjustments:
- Rotate the fixture. On track or adjustable recessed lights, tilt the head slightly until the bright patch leaves your normal viewing zone.
- Move the fixture. If the light is too close to the wall, the beam strikes at a steep angle. Moving it farther out, or choosing a different track position, changes where the reflection lands.
- Raise a picture light. Lighting makers suggest adjusting a picture light higher above the artwork or shortening its arm to reduce glare, as in this guide from a lighting company.
- Accept that there is no single perfect number. The Williamstown Art Conservation Center’s paper on LED museum lighting says the best angle depends on the artwork’s medium, dimensionality and surface, and cautions that no one angle suits everything. Textured canvas with thick paint behaves differently from a flat, smooth print, so adjust by eye.
If you want a deeper look at how lighting shapes a canvas on display, see our guide on why art lighting enhances canvas display at home.
Fix 2: Tame the window
Daylight is the hardest light to manage because it changes by the hour. Two goals: stop direct sun from striking the surface, and soften what remains.
- Place art where light is indirect. The New Mexico State Committee advises positioning artwork near a window only when the light is indirect.
- Use sunscreens. The Tate’s guidance on care of loaned artworks (UK, 2023) says direct sunlight must be excluded from display areas and daylight controlled with curtains, blinds or other sunscreens.
- Think direction and diffusion, not just brightness. The Smithsonian Museum Conservation Institute explains that controlling daylight means managing direction and diffusion as well as intensity and ultraviolet radiation.
- Consider UV-blocking window film. Invaluable lists it among its display-lighting suggestions.
Sheer curtains are a simple, good-looking way to diffuse a bright window. Hang the canvas on a wall perpendicular to the window rather than directly opposite it, and the sun will rake across the surface instead of bouncing into the room. For spacing near windows, our note on art placement around windows covers how far to keep frames from the opening.
Fix 3: Choose the right bulbs and accessories
The bulb will not remove glare by itself, but it affects how harsh the light is and how safe it is for the artwork.
- LEDs. Architectural Digest says LED bulbs emit no UV and little heat compared with halogen sources. If you use halogen, it advises keeping it at a safe distance and fitting UV filters.
- High color rendering. Invaluable recommends LEDs with high color rendering, together with accessories such as a softening lens, so the light is diffused and colors read true.
- Dimming. Lower intensity means a weaker reflection and gentler exposure. A dimmer on the circuit lets you find a level that looks rich without a hot spot.
How bright is too bright?
Museums set numbers for this. Treat them as a reference point, not a home requirement.
| Source | Guidance | Applies to |
|---|---|---|
| Texas Historical Commission, 2024 | Up to 150 lux for oil paintings, which it classes as less sensitive; ideal UV of 0 to 10 microwatts per lumen, maximum 75 | U.S. museum collections |
| Tate, 2023 | Generally no more than 200 lux for most works; no more than 50 lux for particularly vulnerable materials such as exposed canvas; UV below 400 nanometres effectively eliminated | U.K. loaned artworks |
The Texas Historical Commission also states that light damage is irreversible and cumulative, and recommends switching exhibit lighting off when a space is not in use. At home, that translates to a simple habit: do not leave spotlights on all day for a room nobody is in. For current professional practice, the museum-lighting standard is ANSI/IES RP-30:2025, which is listed here.
If you are choosing a canvas for a bright room, our buyer’s guide to UV-resistant canvas explains what to look for, and our piece on canvas print lifespan covers how light exposure fits into long-term care.
Our perspective
We see the same pattern with almost every customer who writes to us about glare: the artwork is fine and the lighting is the problem. A bold canvas, whether it is a graffiti piece, a pop art portrait or a high-fashion statement, is meant to be looked at from across a room. That only works when the light flatters it.
Our canvases are made in the USA, ready to hang, with archival inks and quality materials, and they carry no glass in front of the image. That is a real advantage for display: you are working with a surface that is not stacked behind glazing, so a small change of the light angle usually settles things.
Our advice is to hang first, then light. Hang the piece where you will see it most, walk across the room, and note where reflections show up. Then adjust one light at a time. If you are decorating a new home or a rental, a floor lamp or plug-in picture light that you can move is a low-effort way to get the angle right without touching the ceiling.
We would rather you enjoy a piece every day than keep it in a spot you picked for its light. Good lighting is what makes a statement piece look like one.
James
Photographing a canvas without glare
If your question is about photographing a canvas, for a listing, a portfolio or a social post, the principle is the same, but you control everything. The steps below come from Amateur Photographer, the New Mexico State Committee, and Carlson Art Photography.
- Kill the competing light. Turn off overhead and mixed lighting, and do not use on-camera flash. A light near the camera reflects straight back into the lens.
- Set two identical lights at 45 degrees. Place one on each side of the canvas. Matching lights keep the illumination even.
- Square up the camera. Keep the canvas and the camera on parallel planes, and put the camera on a tripod.
- Trigger without touching. Use a timer or remote release so the camera does not shake.
- Move the lights outward if a reflection remains. Amateur Photographer says to bring the lights farther around the sides so they strike the work at an acute angle of at least 45 degrees. The New Mexico State Committee says the same: slide them out until the reflection disappears.
- Use sensible settings. Carlson Art Photography recommends ISO 100 to 200, an aperture of f/8 to f/11, and RAW when possible.
Using window light instead
No lights? Shoot near a window only when the light is indirect, and avoid direct sun because it creates hotspots and harsh shadows. An overcast day or a north-facing window works well. Turn the room lights off so the colors do not mix.
Stubborn reflections: use polarizers
For varnished or glazed work, Amateur Photographer suggests a circular polarizer. For the toughest cases, polarize both lights and the lens, then rotate the lens filter 90 degrees to cross-polarize. A technical write-up from Cultural Heritage Science Open Source explains why this works: reflected glare keeps its polarization, while diffuse light from the surface does not, so a filter turned against the polarized lamps suppresses the glare and leaves the color. It also recommends a circular polarizer if you use autofocus, and a linear one for manual focus.

Can an app remove glare afterward?
The New Mexico State Committee’s guide mentions Lightroom Mobile and Snapseed for careful editing such as exposure adjustments, and it does not claim they remove glare. Treat apps as a finishing step for brightness and color, and fix reflections at the source with light placement.
A quick fix table
| What you see | Likely cause | What to try |
|---|---|---|
| Bright patch from ceiling spots | Beam angle near 45 degrees | Re-aim toward about 30 degrees, or move the fixture |
| Sheen that changes during the day | Window light | Sheer curtain, blinds, UV film, or a different wall |
| Reflection of lamps or screens | Stray light sources in the room | Move or switch them off while viewing |
| Hot spot in a photo | Flash or a light near the camera | Two lights at 45 degrees, no flash |
| Reflection that survives everything | Glossy surface or glazing | Circular polarizer, or cross-polarization |
Pick a spot and a piece that works with your light
A wall that gets steady, indirect light is the easiest place for a statement canvas. If your room is bright, choose the wall beside the window, not in front of it. If it is dim, a movable LED fixture will do the work.

When you are ready to hang, our guides on how to hang canvas art and how to hang a flat canvas on the wall take you through it. For small spaces, see decorating studio apartments with large canvases.
Ready-to-hang canvas for a well-lit room
Our collection has more than 1,000 designs, made in the USA and ready to hang. For a room with strong character, start with our graffiti and street art canvases or our pop art canvas prints. If fashion is your thing, browse the Luxury Art collection.

Each piece arrives ready to go on the wall, so you can spend your time on the part this article is about: getting the light right.
FAQ
How do I reduce glare on a canvas on my wall?
Find which light is causing it by switching lights off one at a time and closing the blinds. Then re-aim ceiling lights so the beam hits the center of the canvas at about 30 degrees, and soften or block direct window light. Dimming the lights also helps.
Does a canvas get glare like a framed print?
It can still reflect a bright light, but a canvas without glass or acrylic in front of it avoids the glazing reflections that framed pieces get. What remains is usually light angle, so small adjustments to fixtures or curtains are normally enough.
How do I photograph a canvas painting without glare?
Turn off overhead lights, skip the flash, and place two matching lights at 45 degrees on either side. Keep the camera on a tripod, parallel to the canvas, and move the lights farther to the sides if you still see a reflection. A circular polarizer helps with stubborn cases.
Can an app remove glare from a photo of a canvas?
Apps such as Lightroom Mobile and Snapseed are useful for exposure and color adjustments, but they are not a reliable substitute for good lighting. Remove the reflection when you take the photo by moving the lights and turning off competing sources.
How bright should the light on my canvas be?
Museums keep levels low: the Texas Historical Commission gives up to 150 lux for oil paintings, and the Tate gives no more than 200 lux for most works and 50 lux for particularly vulnerable materials. At home, use LEDs, dim them to a comfortable level, and turn them off when the room is empty.
Sources
- Photographing Artwork, New Mexico State Committee of the National Museum of Women in the Arts
- 8 Tips for Lighting Art, Architectural Digest
- LED Lighting in the Museum Setting, Williamstown Art Conservation Center
- How to Light Art, Invaluable
- Recommended Light Levels, Texas Historical Commission
- Care and treatment of loaned artworks, Tate
- Smithsonian Museum Conservation Institute
- ANSI/IES RP-30:2025, Intertek Inform
- How to photograph artwork, Amateur Photographer
- How to Photograph Artwork for Your Portfolio, Carlson Art Photography
- Polarized Light Photography for Art Documentation, Cultural Heritage Science Open Source
Audrey Hepburn Wall Art Ideas for Every Room